
HDD file recovery with TestDisk under Linux


Hard Disk Drives (HDDs) are an essential part of most computer systems. They store vast amounts of important data, ranging from personal photos and videos to critical business documents and financial records. However, due to various reasons, HDDs can suffer from data loss. This can be caused by anything from a simple power outage to a physical failure of the disk.
Fortunately, there is a way to recover the lost data, even in the face of disk failure, using TestDisk. TestDisk is a free, open-source data recovery tool that can scan a damaged disk and retrieve lost partitions and files. This tool is widely used by IT professionals, data recovery services, and home users alike, due to its ease of use and powerful features.
In this post, we'll take a look at how to use TestDisk to recover lost data from an HDD under Linux.
Install, execute and recover data
Step 1: Download and Install TestDisk
TestDisk can be downloaded from the official website (www.cgsecurity.org), or you can also install it on a Linux system with apt:
sudo apt-get install testdisk
Step 2: Launch TestDisk
After installation, launch TestDisk using the following command:
sudo testdisk
Step 3: Create a log file
Testdisk will ask if you want to create a log file containing technical information and messages from the recovery process.
For the reason of this step-by-step, select 'No Log' and press the 'Enter' key.
Step 4: Select the HDD to be scanned
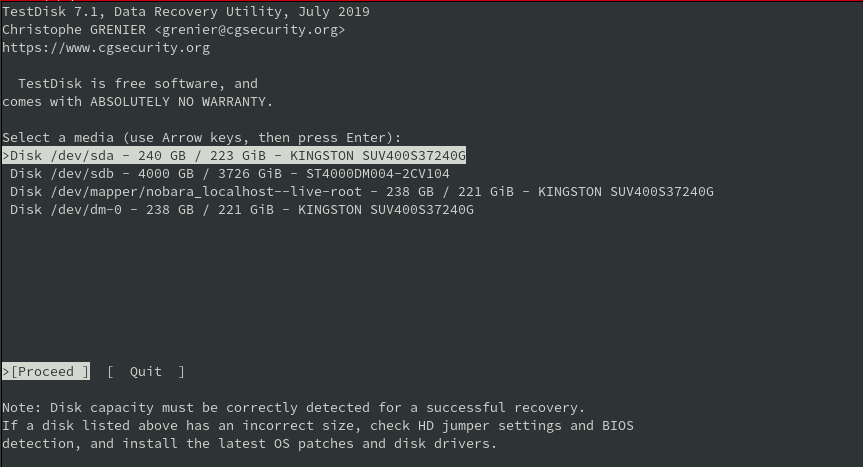
TestDisk will display a list of available drives. Select the drive from which you want to recover data and press the 'Enter' key.
Step 5: Select the partition type
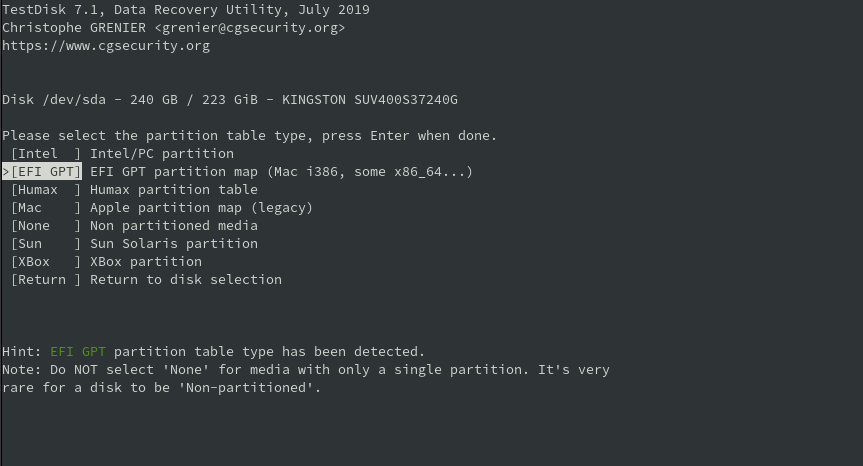
TestDisk will ask you to select the partition type. The most common partition types are 'Intel' or 'EFI GPT' for newer systems and 'DOS' for older systems. Select the appropriate partition type and press the 'Enter' key.
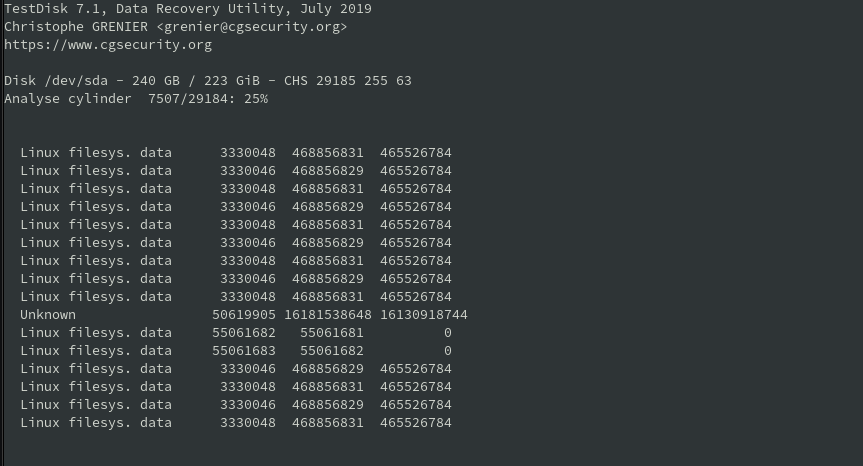
Step 6: Analyze the disk
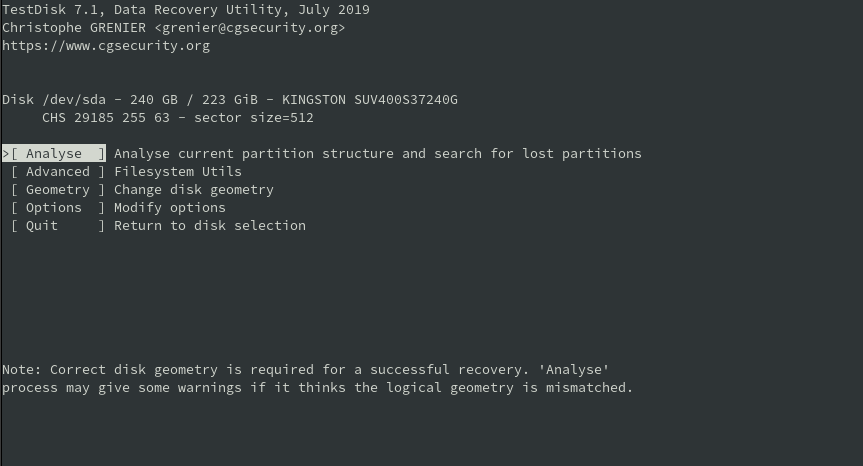
Next, TestDisk will analyze the disk. This process can take several minutes, depending on the size of the disk.
Step 7: Do a Quick Search
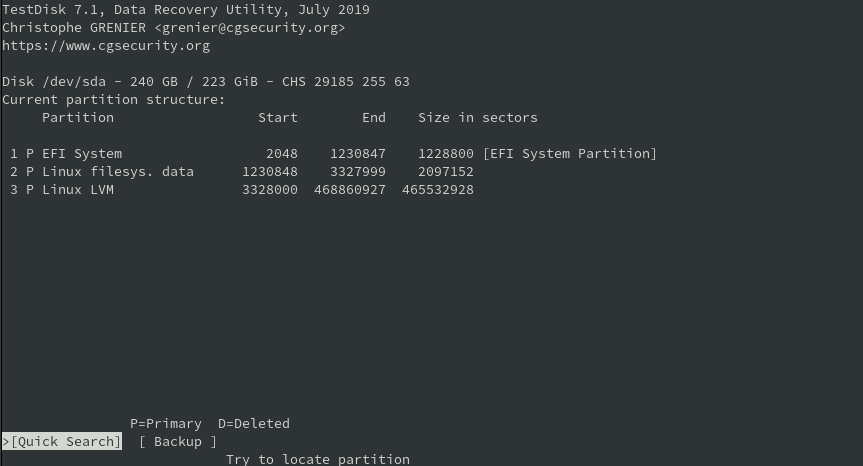
TestDisk will now show you a list of partitions, press 'Enter' to do a 'Quick Search' on the disk and get more information about the partitions.
Step 7: Select the type of scan
Once the quick search is complete, TestDisk will display a menu where you can change your partition settings. Data grabbed from TestDisk should be ok, so just press 'Enter' to continue.
After that, select 'Deeper Search' which will scan the disk in-depth and retrieve as much lost data as possible, this can take a lot of time depending on the size of the disk also.
Step 8: Select the partition to be recovered
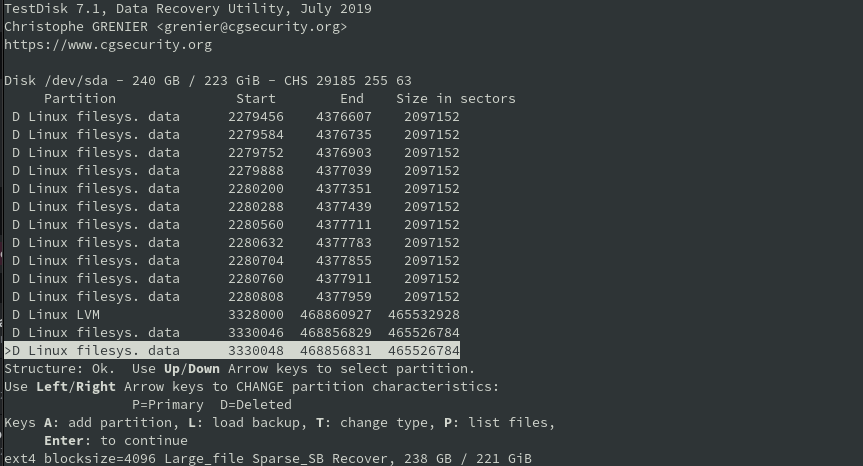
After the scan is complete, TestDisk will display a list of found partitions. Select the partition that you want to recover and press the 'P' key to list all the files.
Step 9: Preview the files
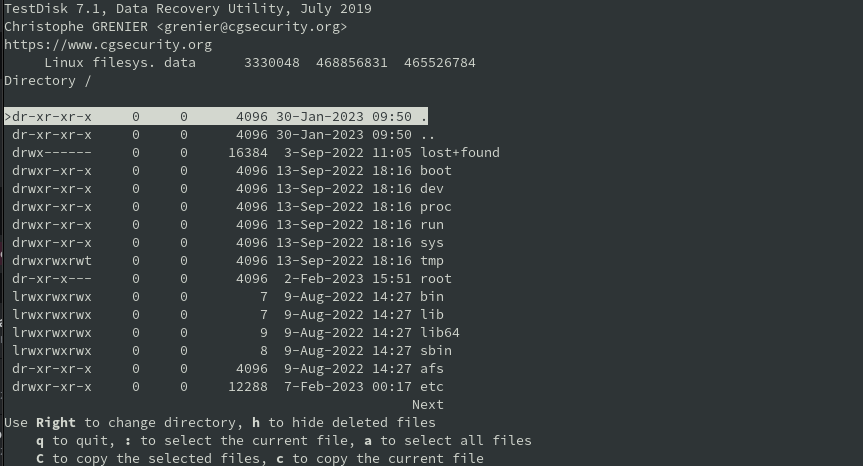
Next, TestDisk will display a list of recoverable files. Preview the files to ensure that they are the ones you want to recover.
Step 10: Recover the files
Finally, select the files you want to recover, or press 'a' to select all files, then press the 'C' key. TestDisk will prompt you to specify a location to save the recovered files. Select a location and press the 'Enter' key. The recovery process will begin, and once complete, the recovered files will be saved to the specified location.
Conclusion
Hard Disk Drives (HDDs) are prone to data loss, but with TestDisk under Linux, it's possible to recover lost data even in the face of disk failure. This open-source tool is simple to use and offers powerful features that can retrieve lost partitions and files with ease. If you've lost important data on an HDD, TestDisk is the ideal tool to help you recover it.