Running Nextcloud with PHP 8.1 under Proxmox LXC


On this post we will run Nextcloud inside Proxmox using the debian-11-turnkey-nextcloud LXC template, after that we will update Nextcloud and PHP to the latest possible versions.
Download the CT Template
First of all we need to download the right LXC template and then create a container, for that, lest dive into Proxmox and start the process.
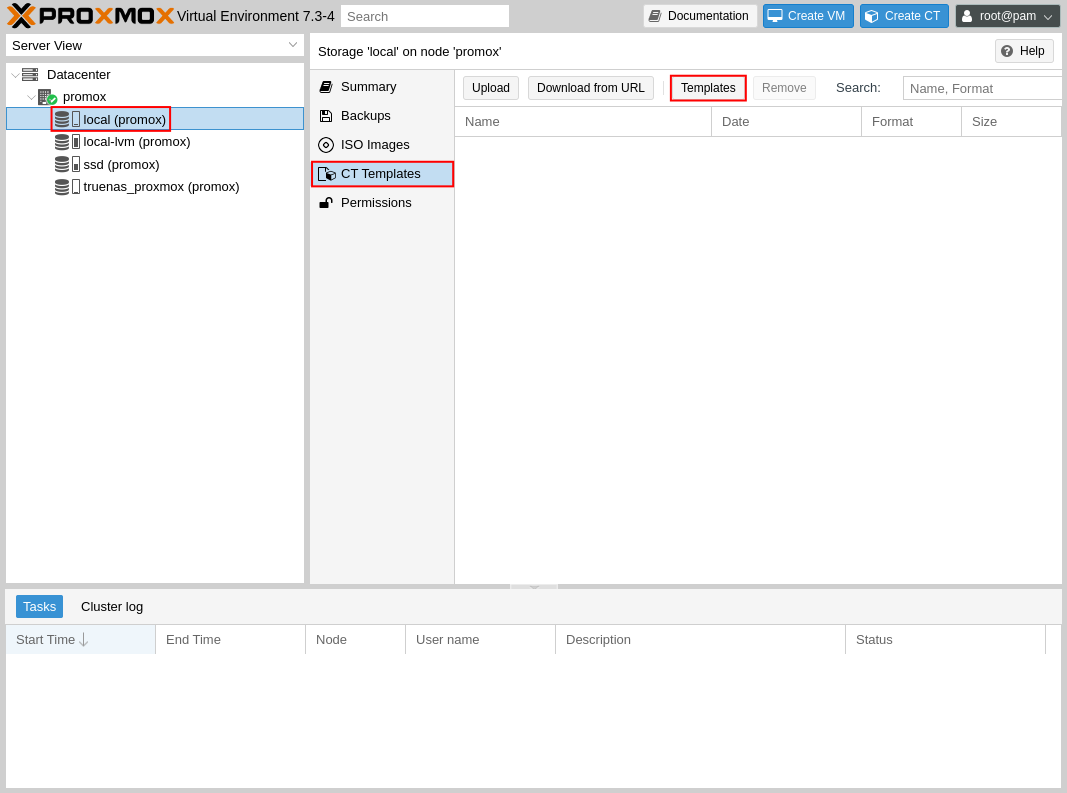
Choose one of you storage devices on the left, then click on CT Templates and finally click the Templates button on the top.
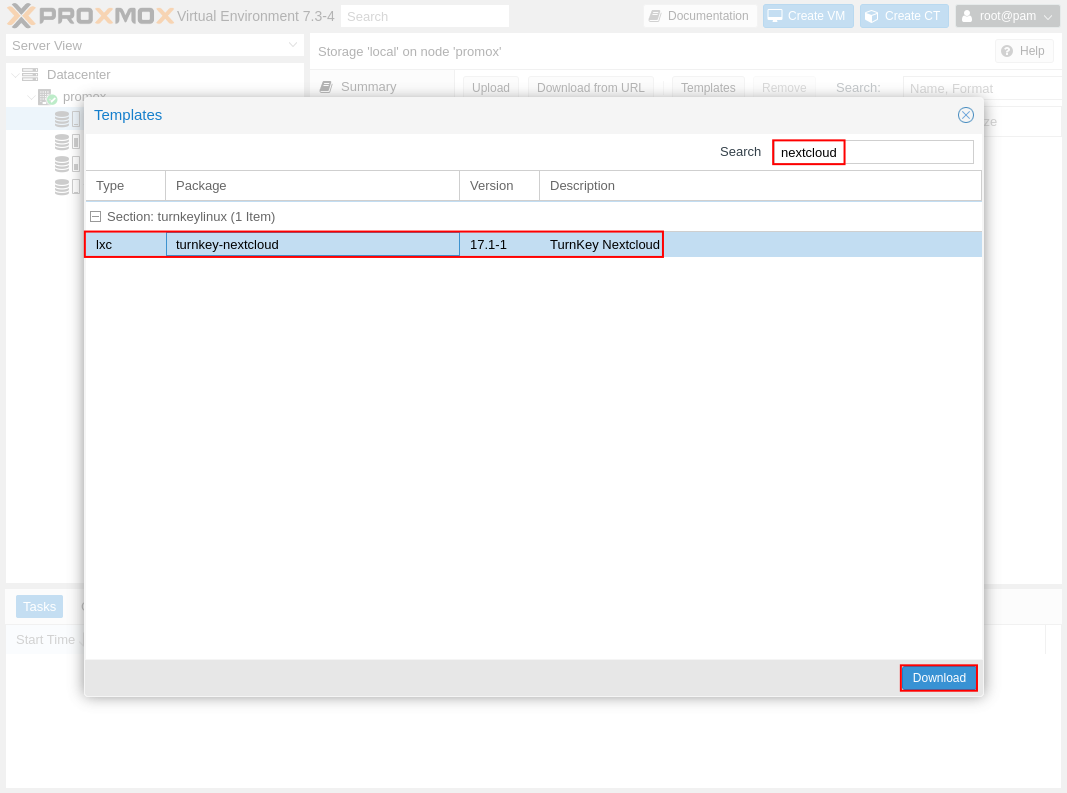
Search for nextcloud and you should see an entry regarding the turnkey image, selected that one and click download.
After the download is completed, you will be able to create your first LXC inside Proxmox.
Create a new LXC container instance
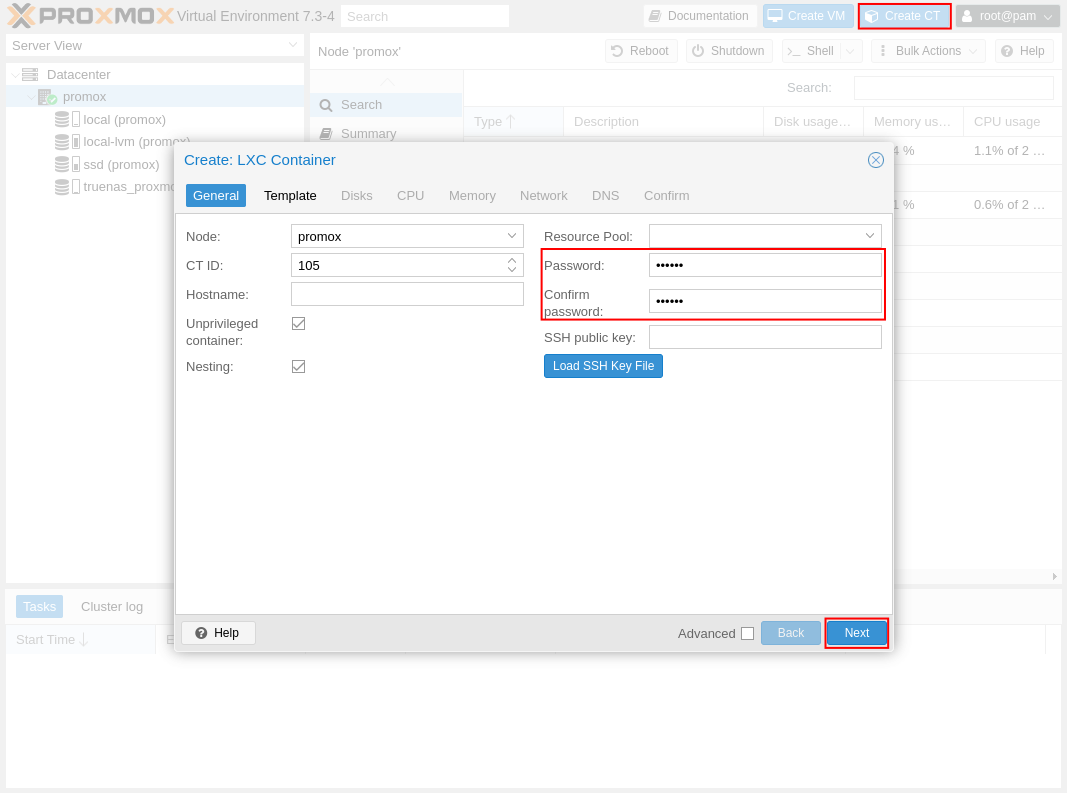
Click on the Create CT on the top right to create a new LXC container, and start by setting the root user password for the container.
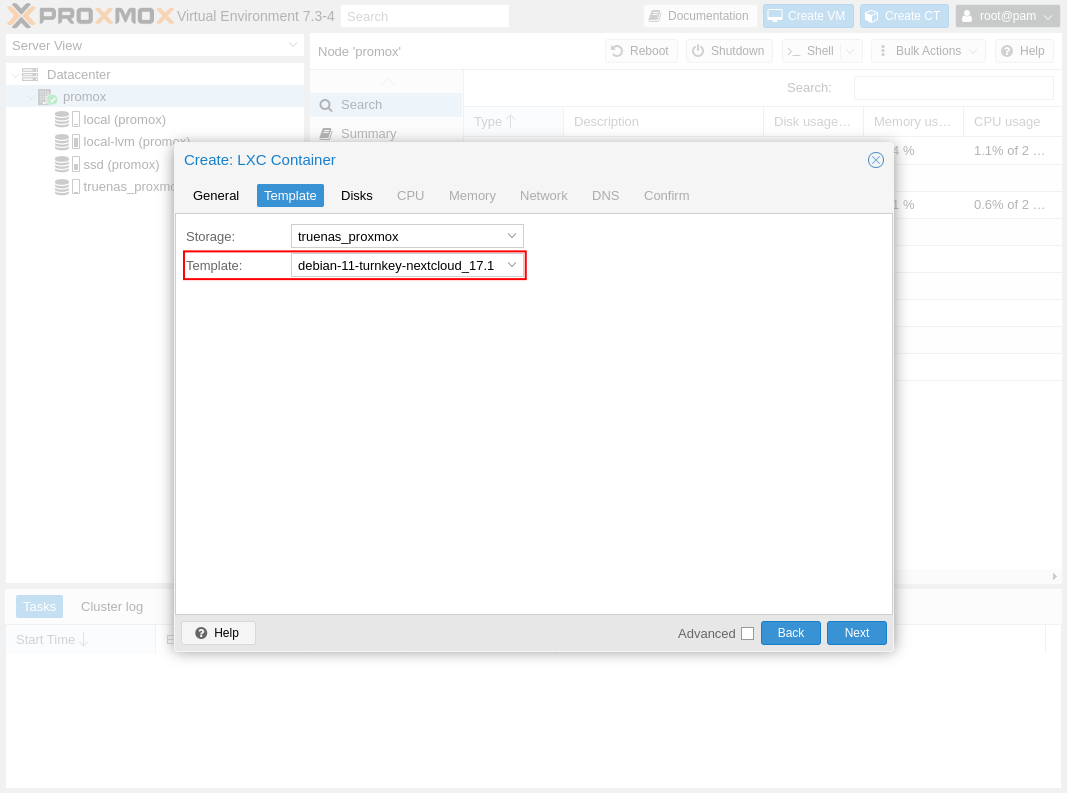
Select the previously downloaded template.
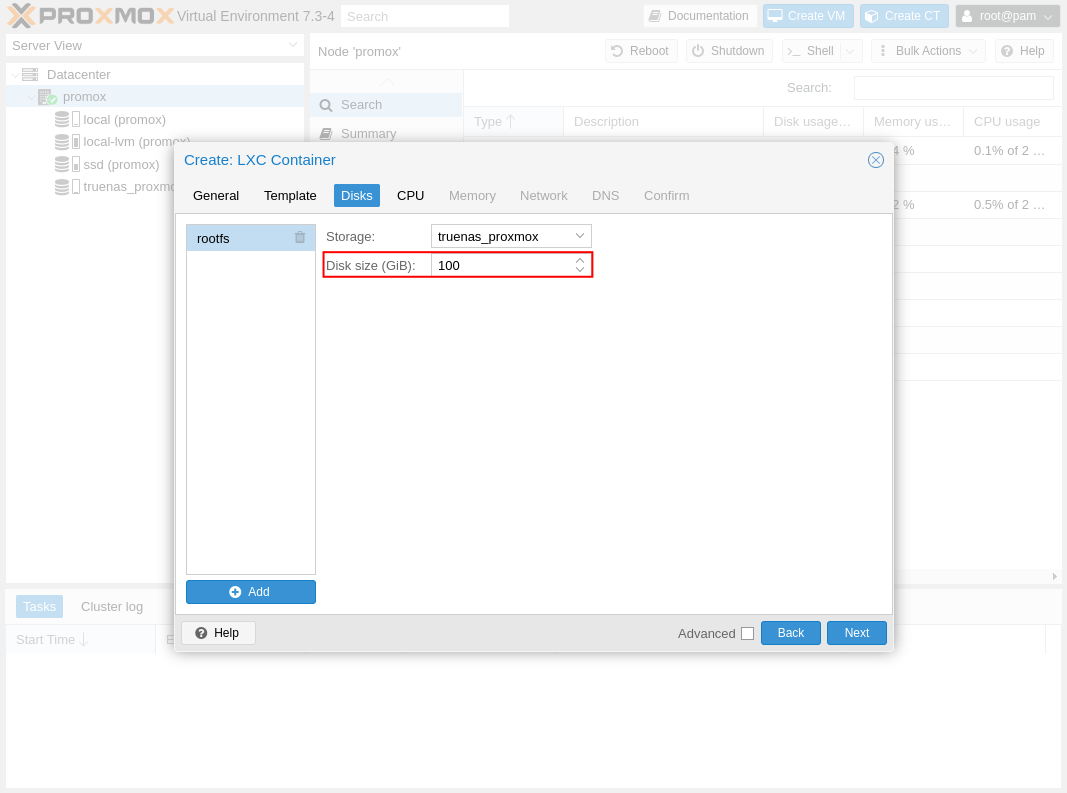
Set the desired disk space, i choose 100GiB because it is the recommended disk space for a Nextcloud VM (check hanssonit.se).
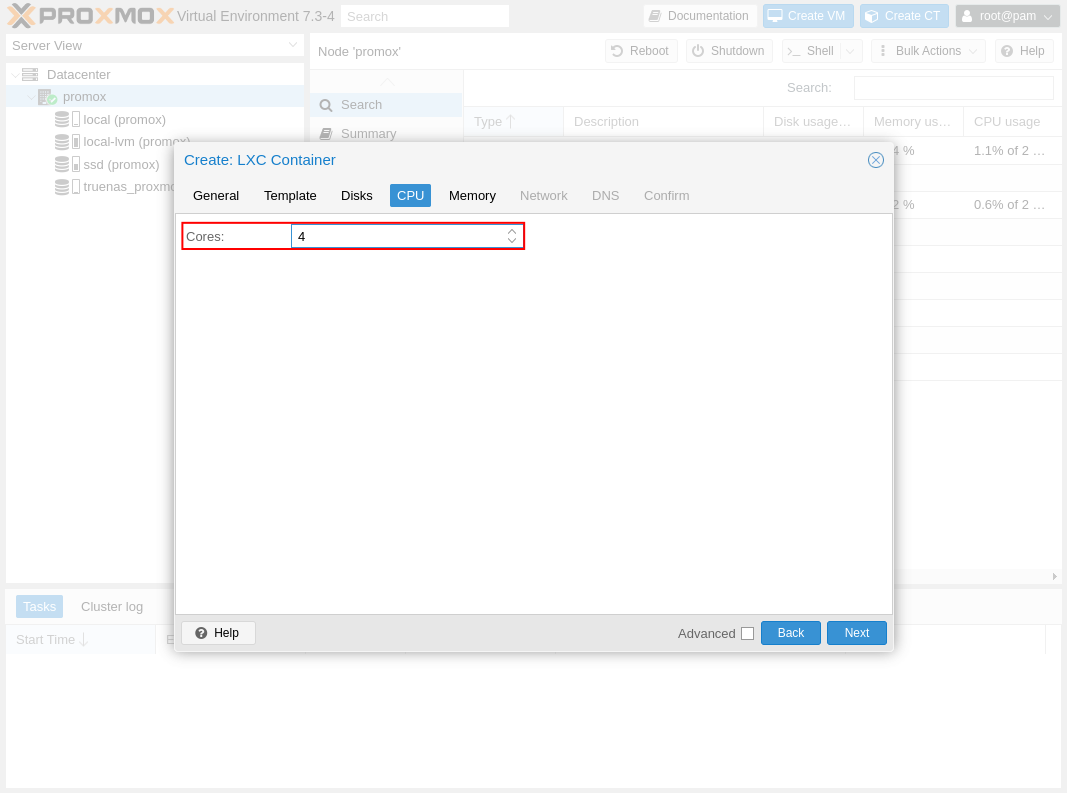
I selected 4 CPU cores, and i got this information from the same link above (check hanssonit.se)
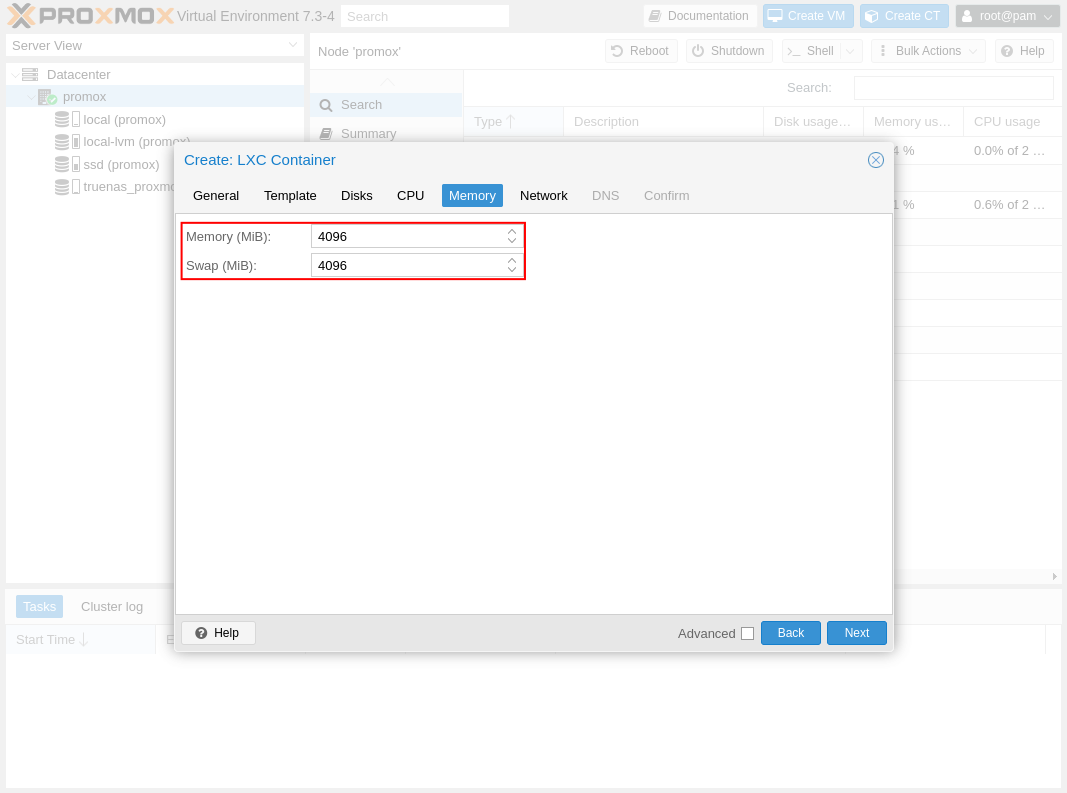
And the same goes for memory, 4GB from the above url.
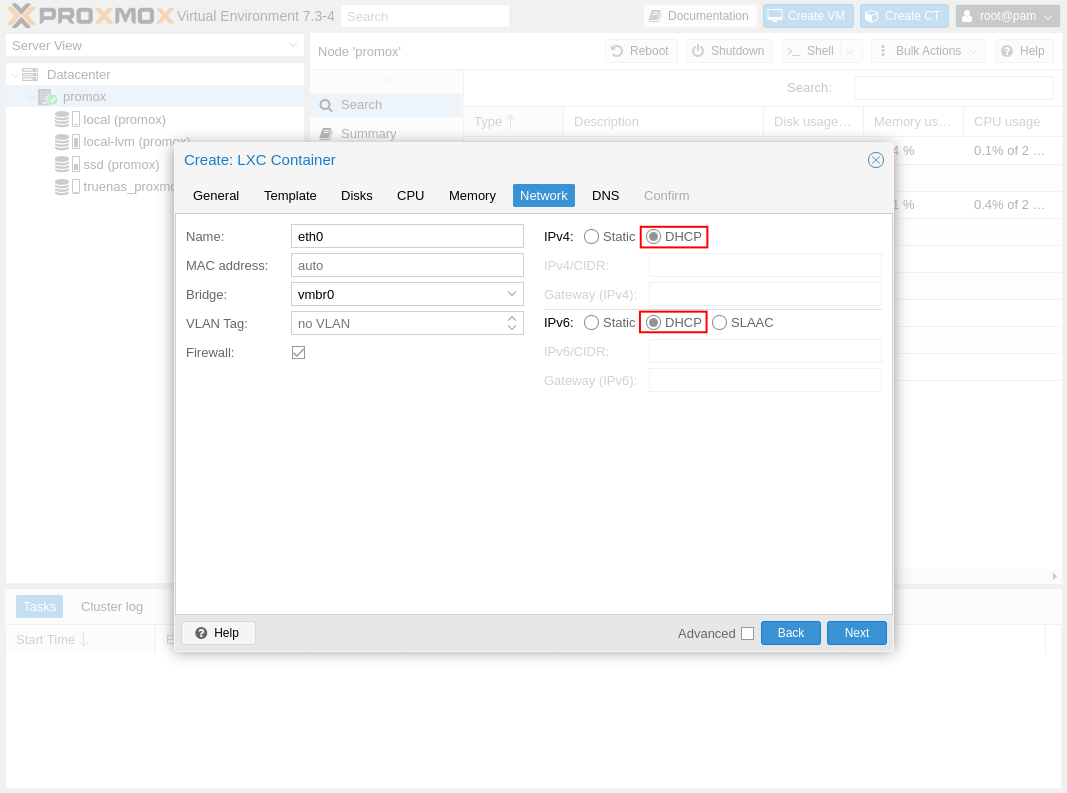
For the Network tab i just changed the IP address to DHCP.
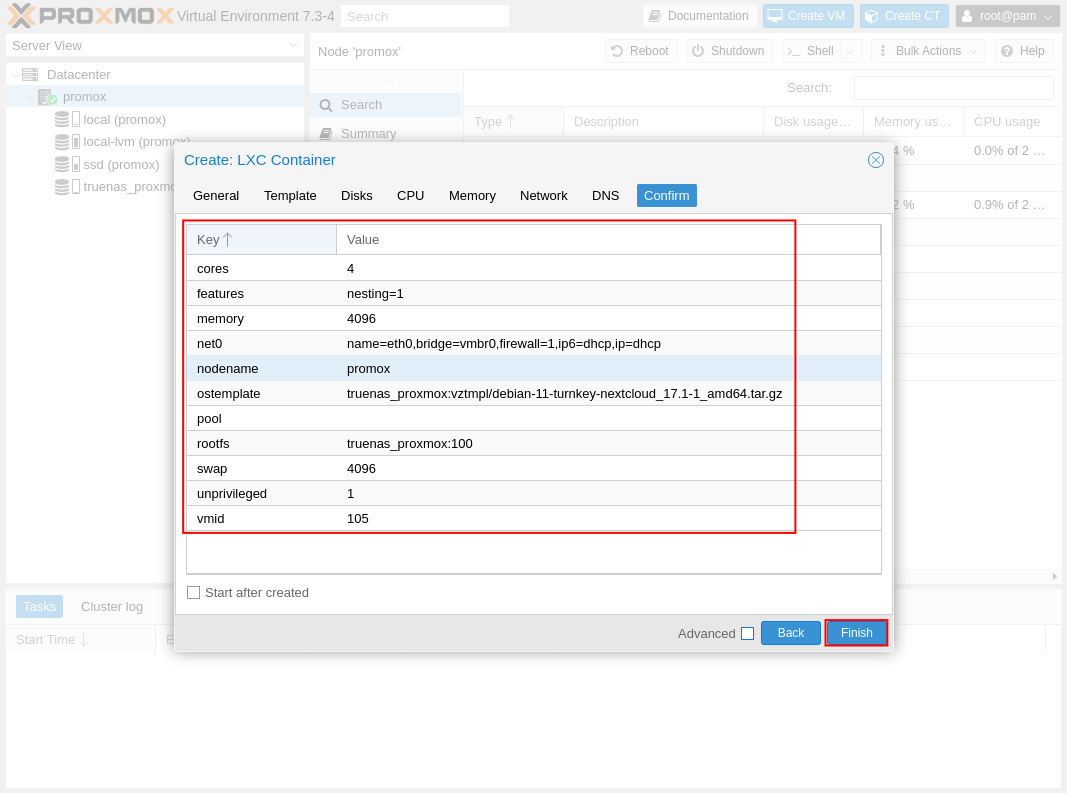
And after this you can go to the end, check if everything is set correctly and click finish.
Completing the Nextcloud installation and starting the server
Your Nextcloud LXC is created, but the setup still hasn't ended.
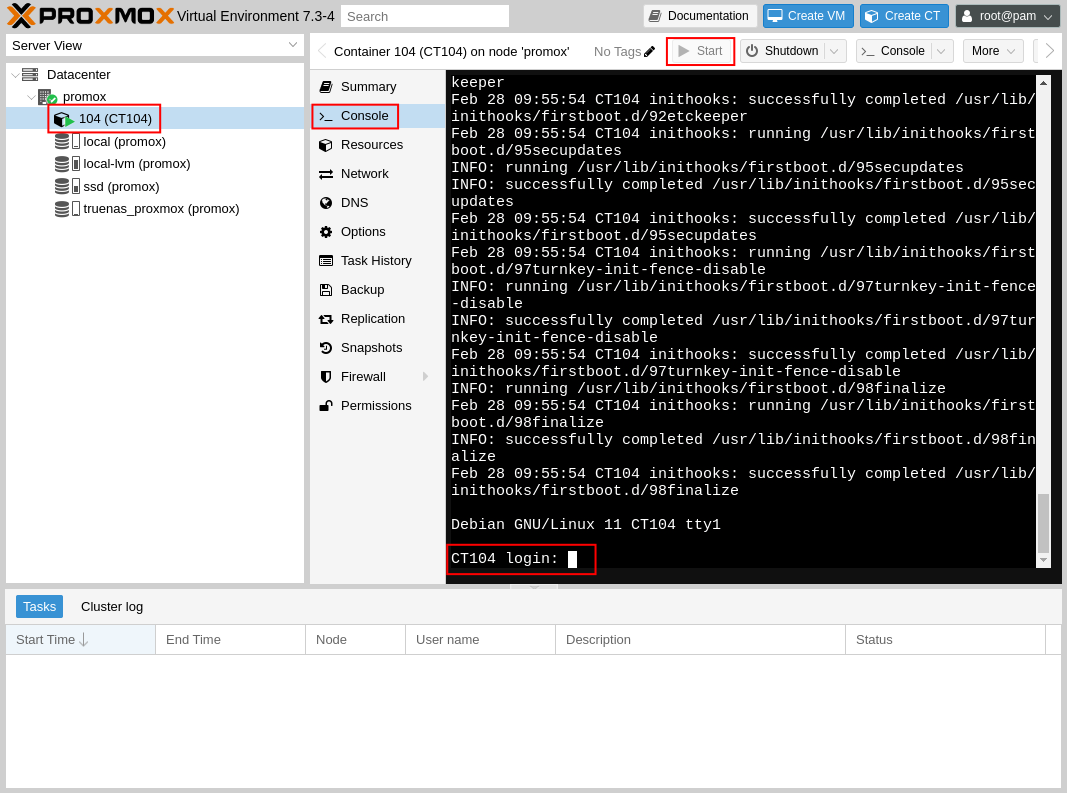
Select the newly created container on the left and then click start.
In order to login into your container, click on console, and use the username root and password you used to create the container.
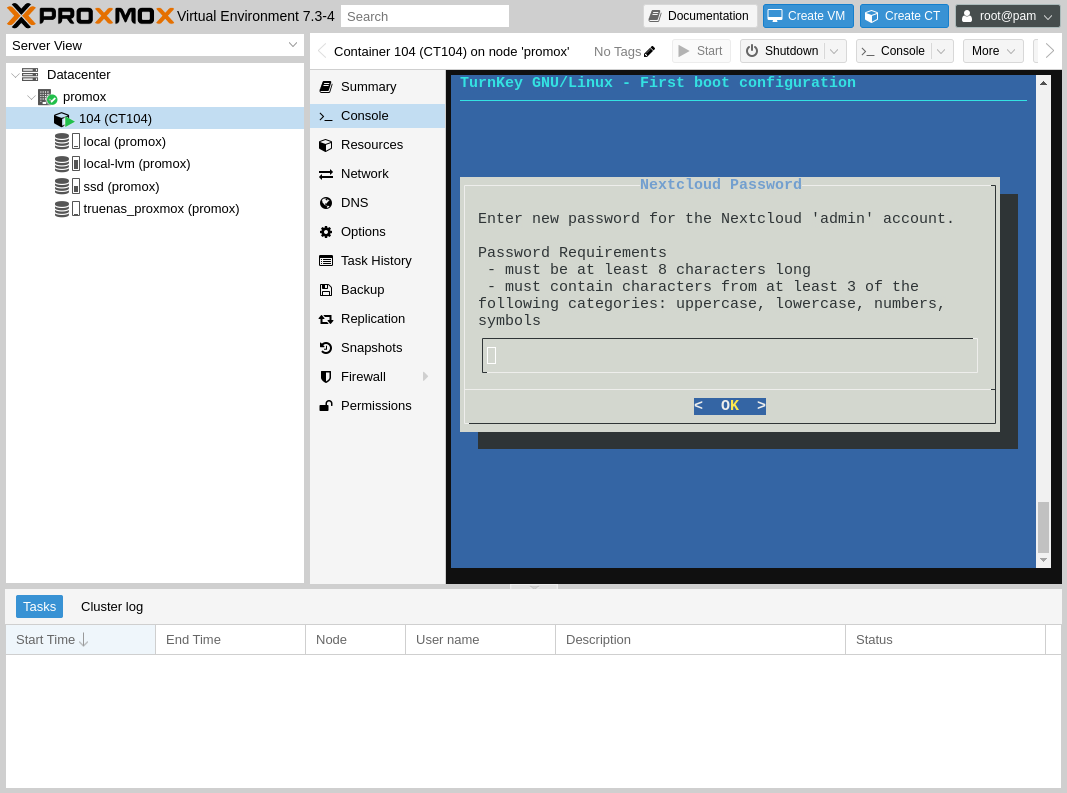
A new screen to finalize the install will show up, just follow the steps to complete the installation.
Choose a password for the MySQL account.

Then choose a password for the default Nextcloud admin account.
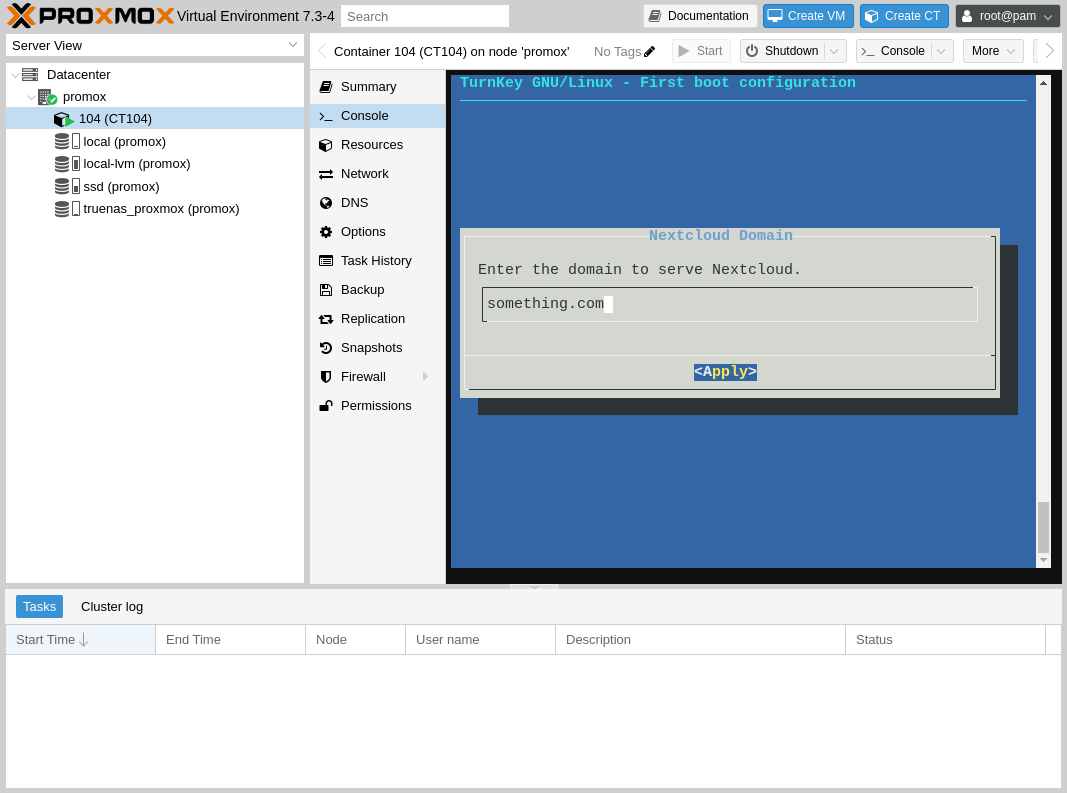
Insert your desired domain for the Nextcloud instance, we will edit the configuration later to accept direct IP access.
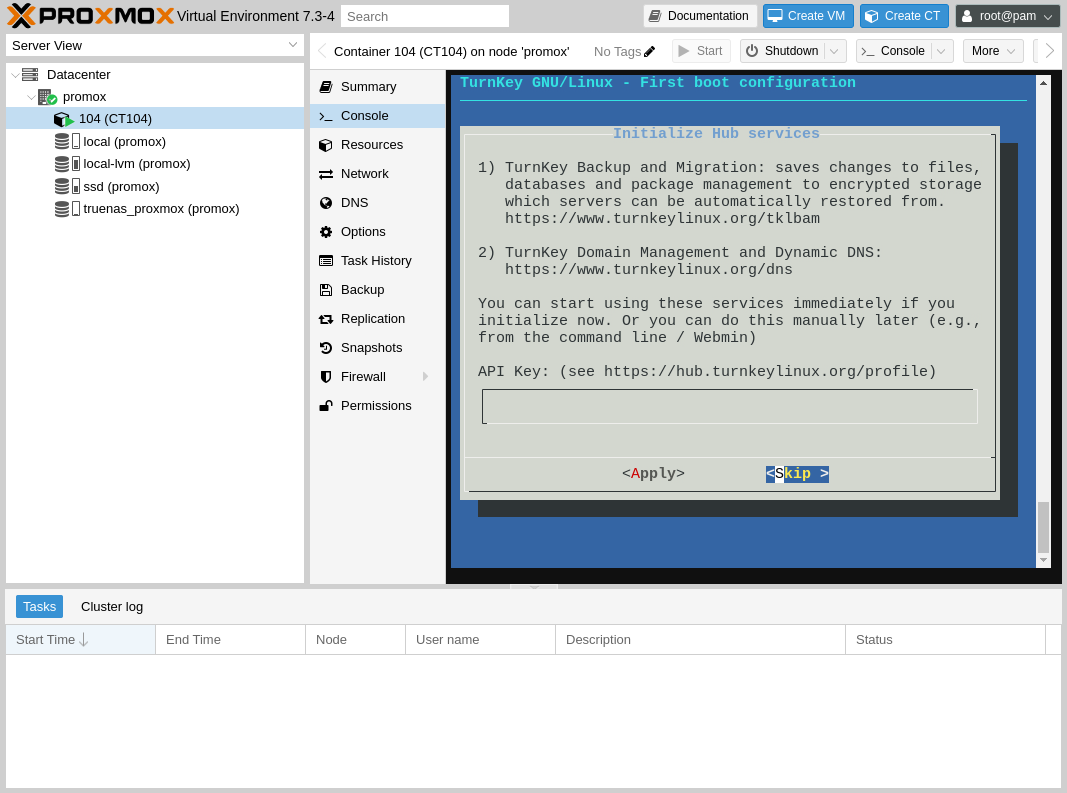
I've skipped the Turnkey services since they are of no interest to me.
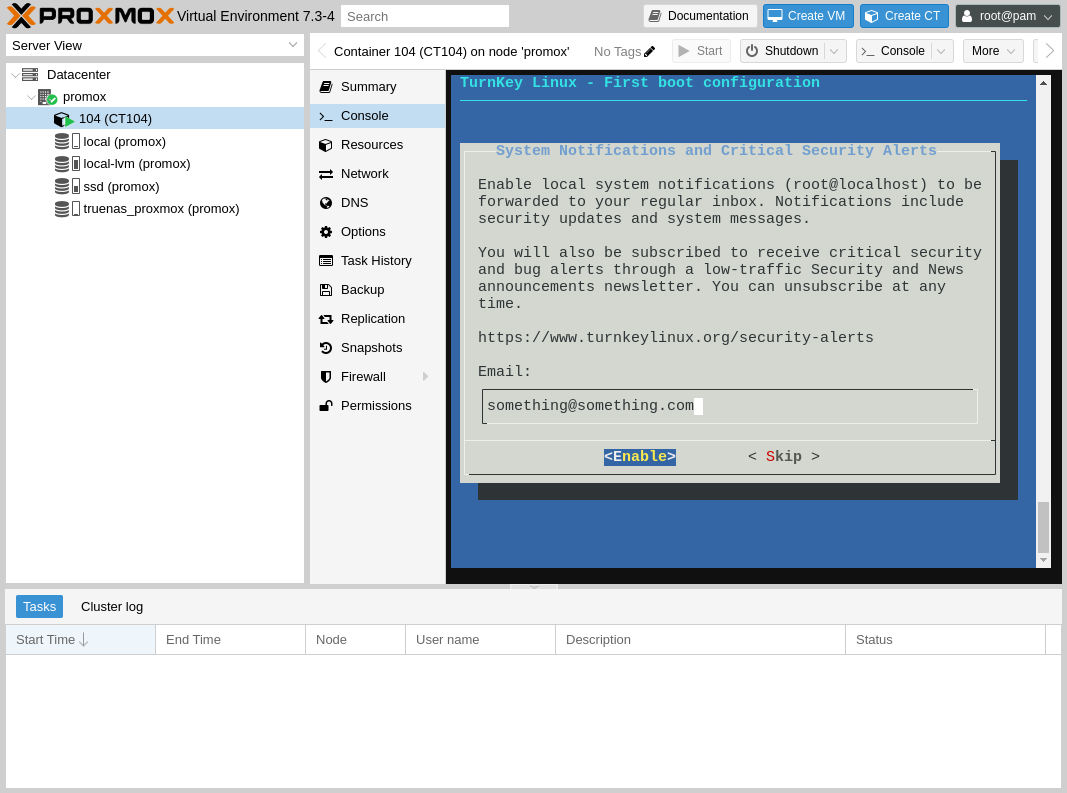
Add your email address so that you can get email notifications regarding important bugs and critical security issues.
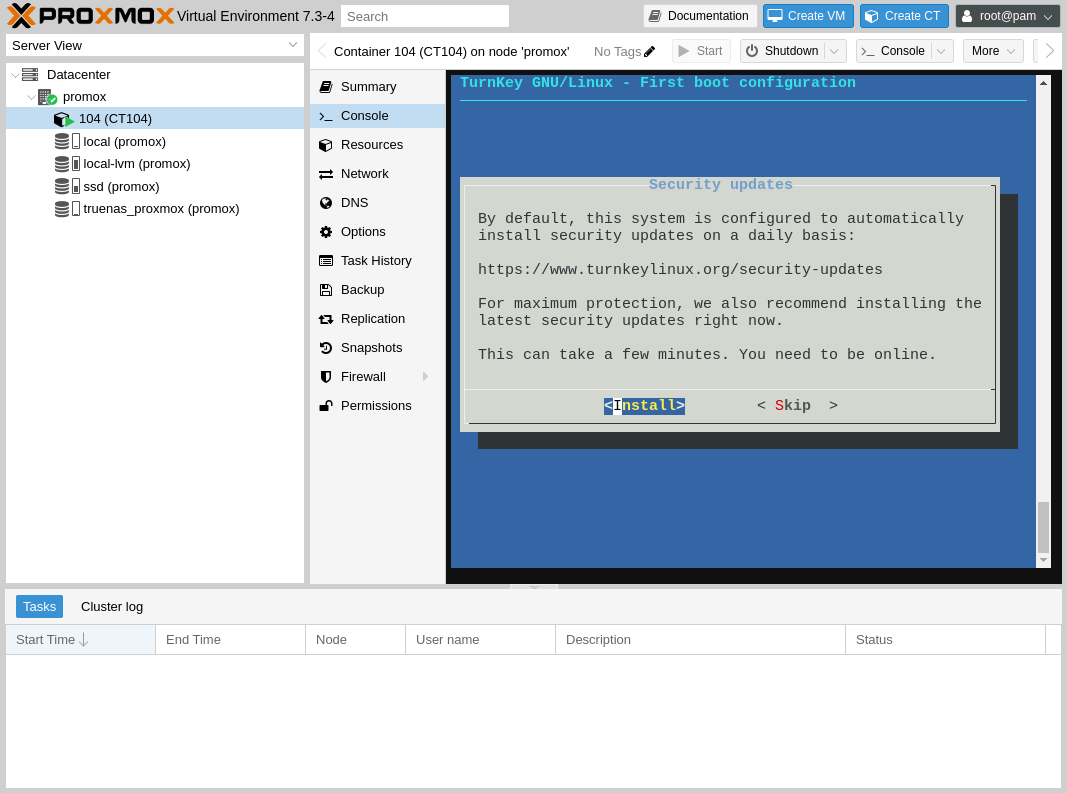
Select to install important updates.
After the packages update you will be prompted with a window will all the IP addresses and information on how to access your new Nextcloud instance.
Upgrade and setup Nextcloud
Upgrade
Easiest way to upgrade Nextcloud to the latest version is by simply running the command:
turnkey-occ upgrade
Follow the process until the end and Nextcloud will be automatically updated to the latest version.
Direct IP access
Next step is to setup direct IP access to the server, and for that, we will need to edit the Nextcloud configuration.
Let's go back to the terminal and edit the required file:
vim /var/www/nextcloud/config/config.php
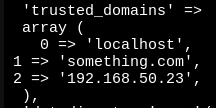
On the file, look for a line that says "trusted_domains" and add your server IP address to the list of domains.
For my example, the Nextcloud IP address was 192.168.50.23, so the file will become:
Now, just save and exit and you will be able to access the Nextcloud server using the IP address from the browser.
Set the default phone region
Let's edit the file vim /var/www/nextcloud/config/config.php and add the following line at the end:
'default_phone_region' => 'pt',
This will remove another warning from the Nextcloud dashboard.
Upgrade the PHP version to 8.1
This is the tricky part, first of all, let's run the command php -v to check what is the current PHP version you have running on your machine.
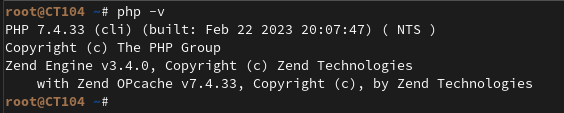
Here we can see that the Turnkey Nextcloud image is running PHP 7.4.33 by default, and we want to run PHP 8.1.
Before moving any further, lets run a full update and upgrade on our system and for that run apt update followed by apt upgrade
After that, let's install some extra packages:
apt install lsb-release ca-certificates apt-transport-https software-properties-common

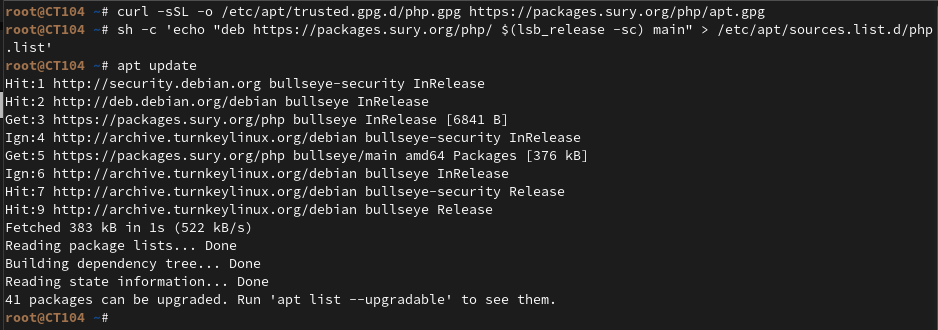
And now we need to add the correct PHP repository from deb.sury.org and run a new update and upgrade.
curl -sSL -o /etc/apt/trusted.gpg.d/php.gpg https://packages.sury.org/php/apt.gpg
sh -c 'echo "deb https://packages.sury.org/php/ $(lsb_release -sc) main" > /etc/apt/sources.list.d/php.list'
apt update
apt upgrade
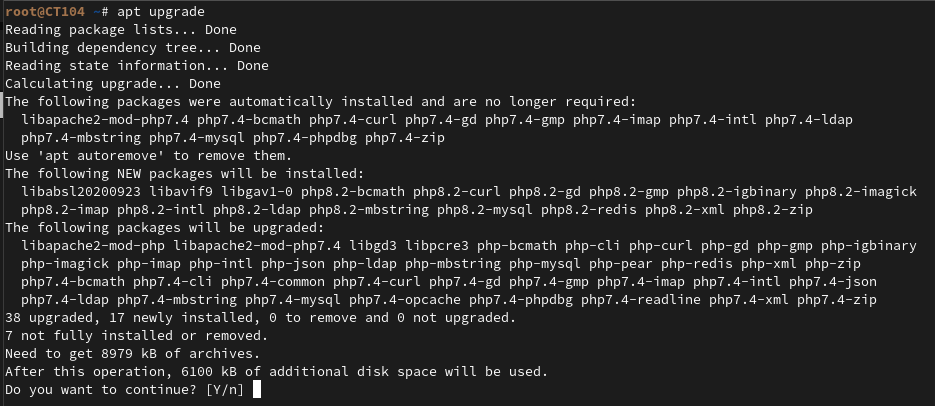
You will notice that our PHP version was automatically updated to version 8.2 and this is not desired since Nextcloud does not support any PHP version over 8.1.
In order to fix this, we will remove the PHP 8.2 and install the PHP 8.1 with a very small command:
apt remove php8.2-* && apt install php8.1-bcmath php8.1-gd php8.1-imap php8.1-mysql php8.1-redis php8.1-cli php8.1-gmp php8.1-intl php8.1-opcache php8.1-xml php8.1-common php8.1-igbinary php8.1-ldap php8.1-phpdbg php8.1-zip php8.1-curl php8.1-imagick php8.1-mbstring php8.1-readline php8.1-fpm

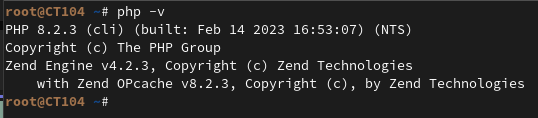
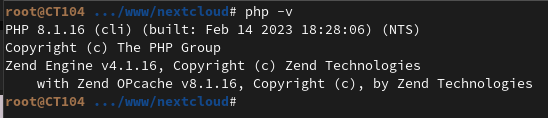
We are almost there, and if we run the command to check the PHP version, we will now see the correct one.
The problem here is that we are using the PHP 8.1 on the command line, but Apache is still using the old PHP 7.4, so we need to fix that.
Running the following commands will activate the required modules, and switch from PHP 7.4 to PHP 8.1 on the Apache side:
phpenmod imagick
systemctl restart php8.1-fpm
a2enmod proxy_fcgi setenvif
a2enconf php8.1-fpm
a2disconf php7.4-fpm
systemctl reload apache2
There is still one final issue, we need to increase the memory limit and max file upload size for both php fpm and php cli.
To achieve this, edit the files /etc/php/8.1/fpm/php.ini and /etc/php/8.1/cli/php.ini and set the values for both configurations. This needs to be done on both files.


And to complete the setup, lets to a final apache reload and restart, and a php-fpm service restart.
systemctl reload apache2
systemctl restart apache2
systemctl restart php8.1-fpm.service
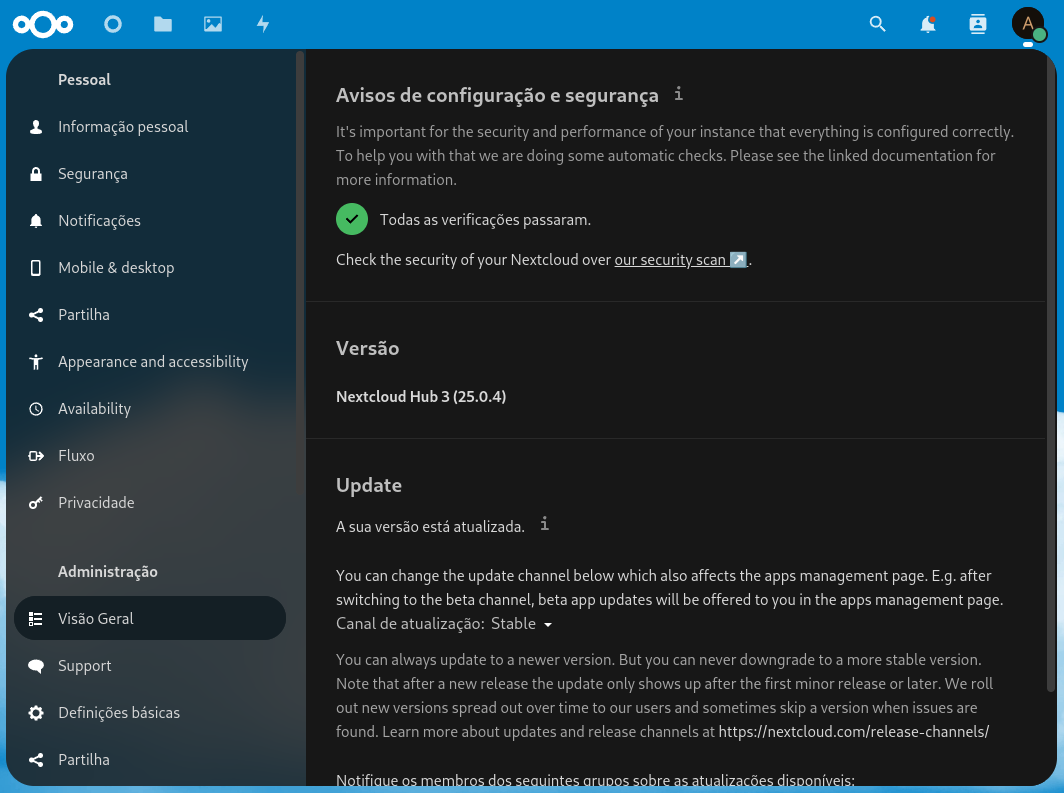
Now when you access Nextcloud and go into the Administration view, you will see a big green arrow saying that everything is OK, and that you are using the final version.