
Garage door Home Assistant

I have an automatic garage door from Doorgate that can be controlled with a RF control or a local push button on the wall and ai wanted to be able to connect it to Home Assistant and be able to open and close the door from there.
The problem
There is no useful information anywhere about the roof motor or on how to control it remotely, so initially I've sent an email to the roof motor company (Doorgate) asking on how to do this or if it was even possible.
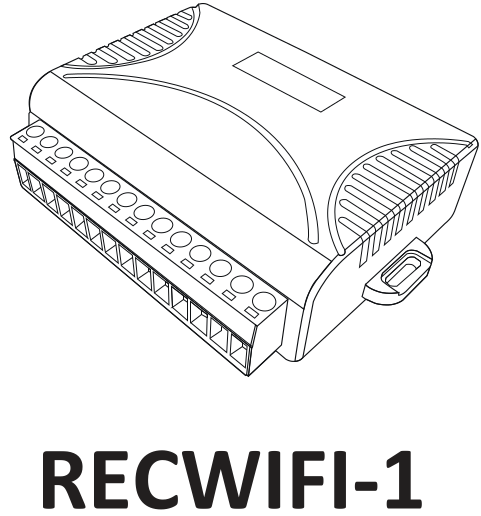
The response I got from them was that they have a device called RECWIFI-1, it's a device with Wi-Fi support that requires a proprietary application (iDoor) in order to be used.
That was not what I wanted or needed and in order to be able to join the garage door control to the rest of my home automation, I needed to have it on Home Assistant, but it looks like it's not possible looking into the response I got.
Still, after some research to understand how the roof motor works and what the device from Doorgate does, I found that the Wi-Fi device was a very simple board containing 4 relays controlled by Wi-Fi with that proprietary application.
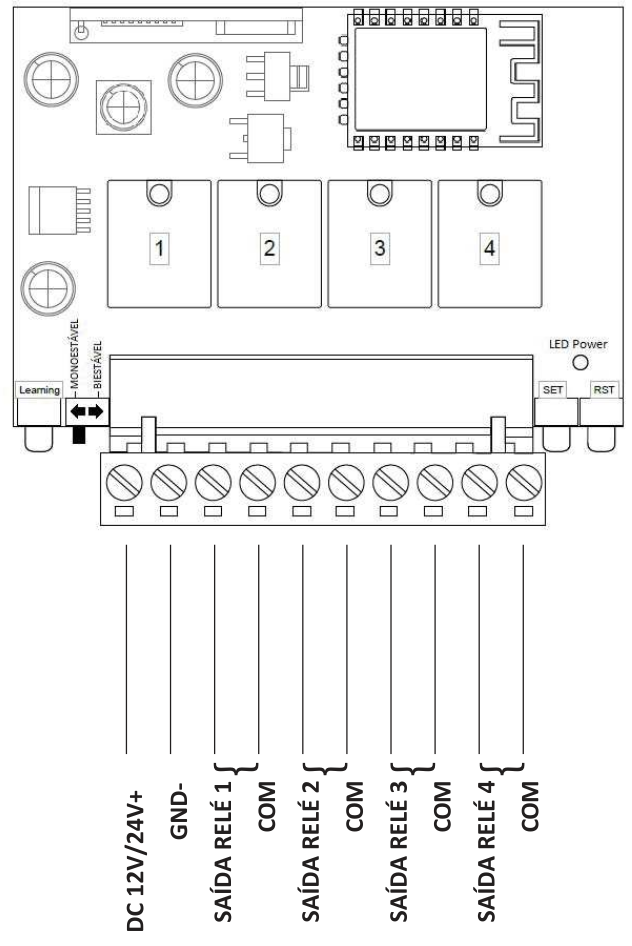
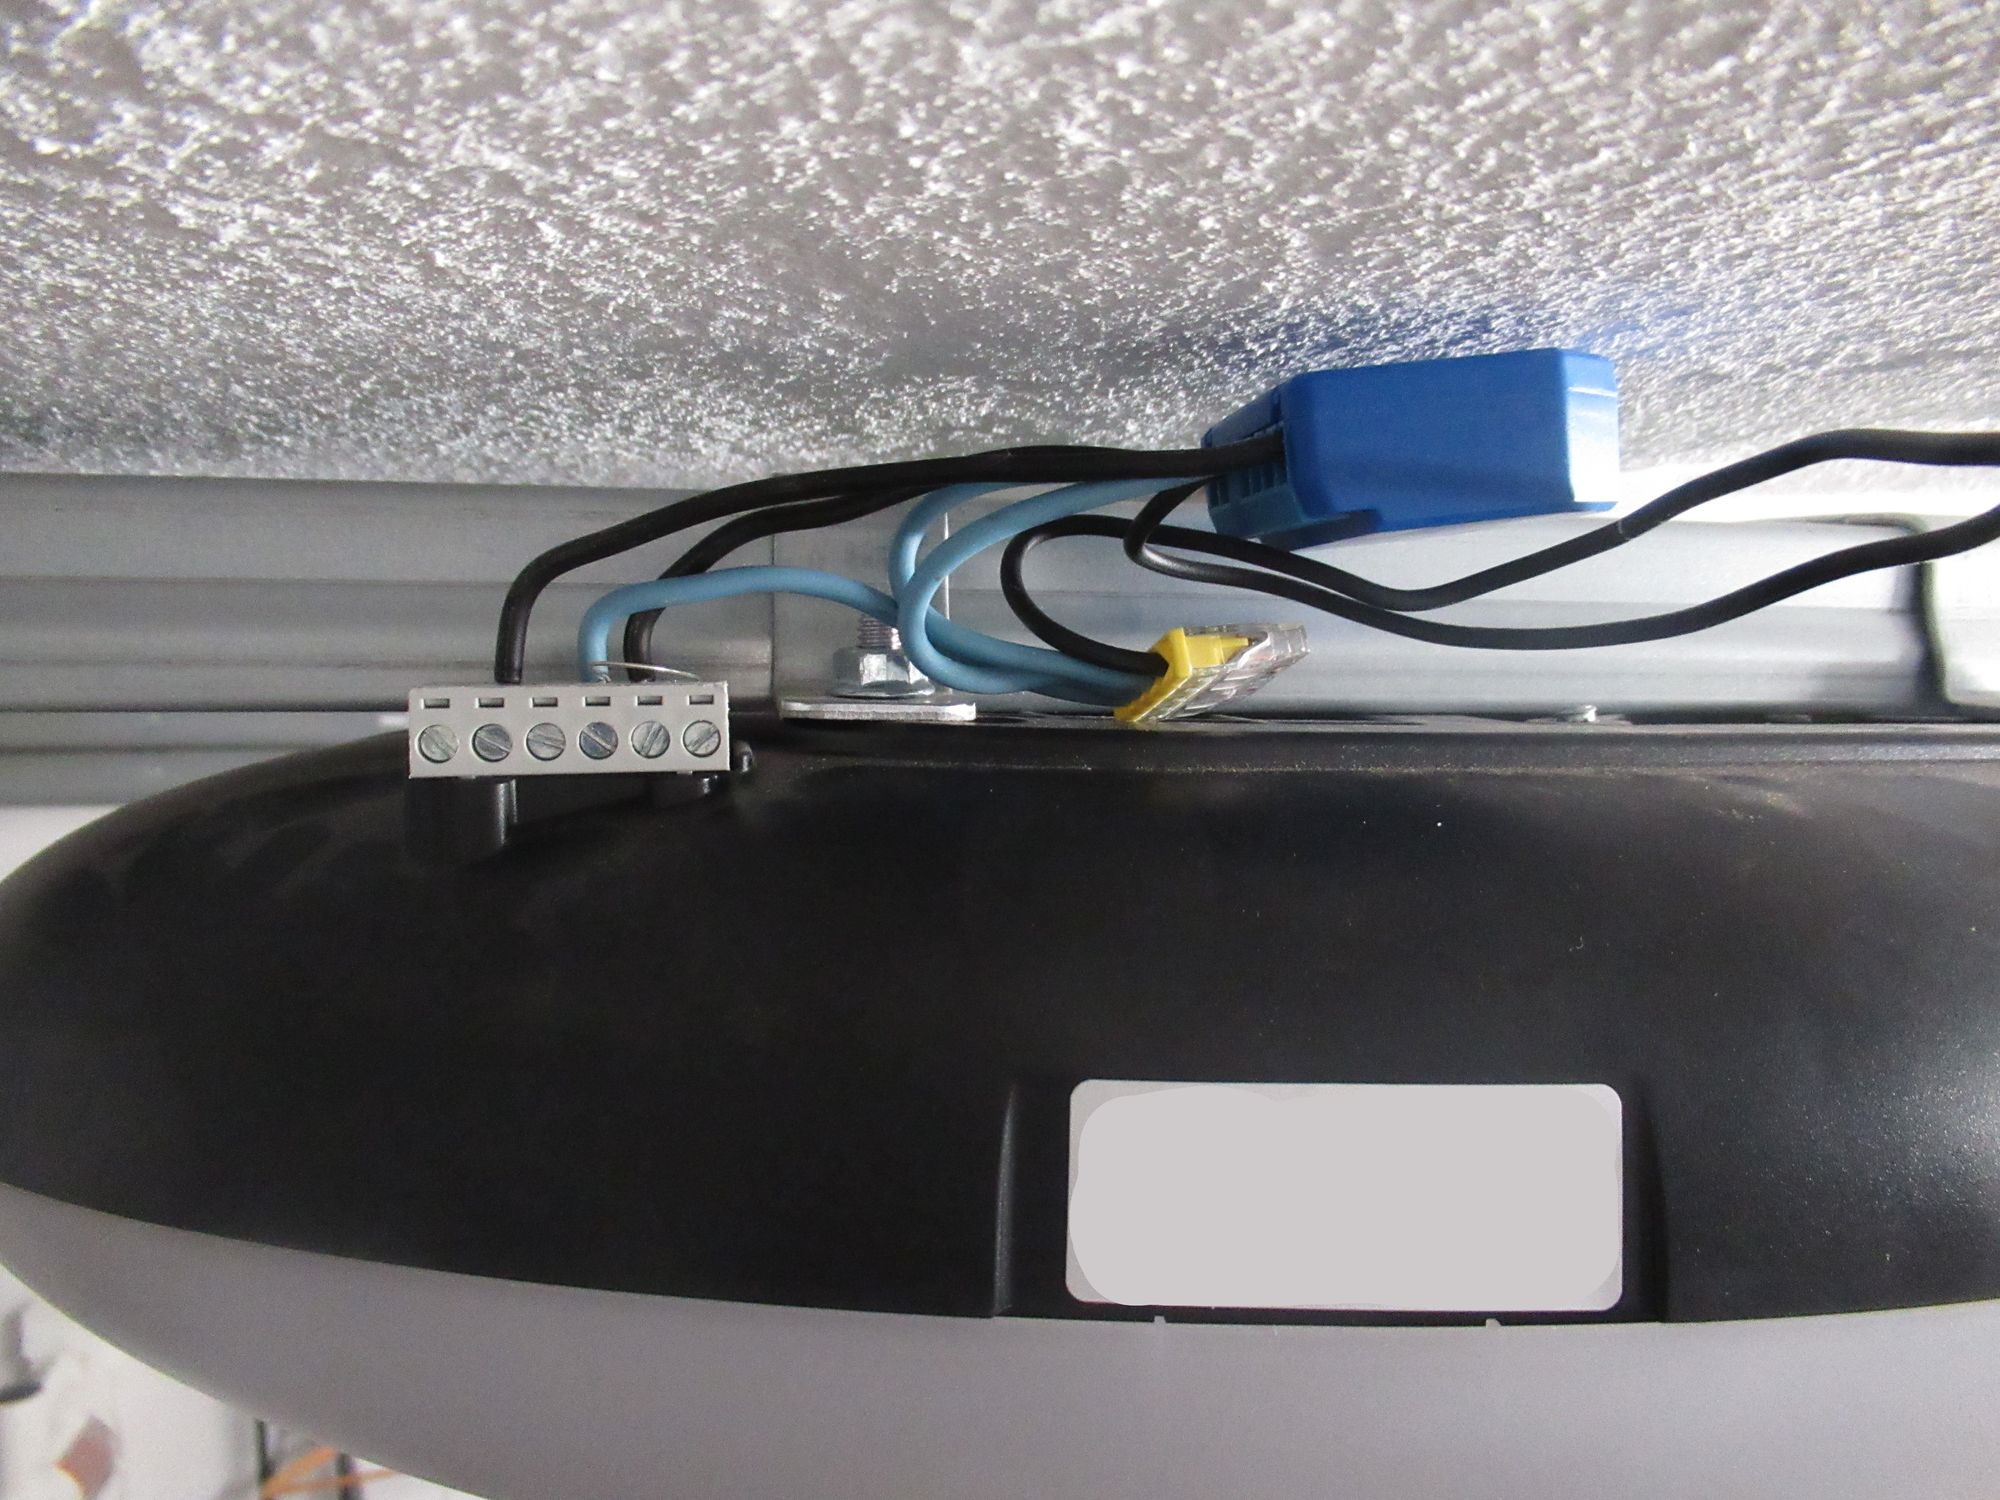
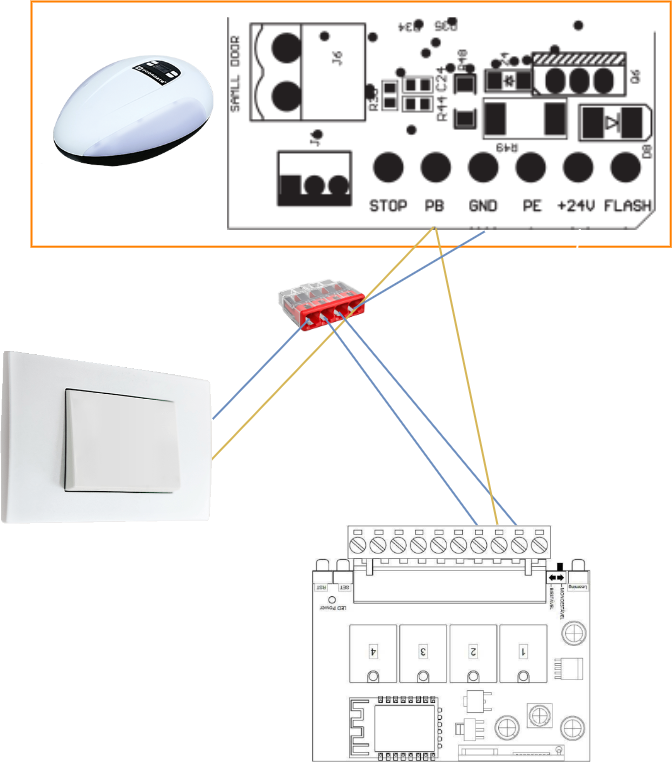
By the looks of the device diagram and the motor connections, the idea from Doorgate is to use one of these relays and simulate the push of the wall button. Meaning that we have 3 relays that we are not even going to use. And the connection for this would be to put the Relay 1 and COM into the same place where the button is connected and power it with the 24V+ from the motor.
The solution
Since the RECWIFI-1 is just a relay, I thought that it should be possible to use a Shelly instead, since it would give the Home Assistant support along with a better and simpler UI.
So the final solution is to use a Shelly Plus 1, connect the wall button to the Shelly in order to be able to keep the button usage information and then connect the Shelly to the motor.
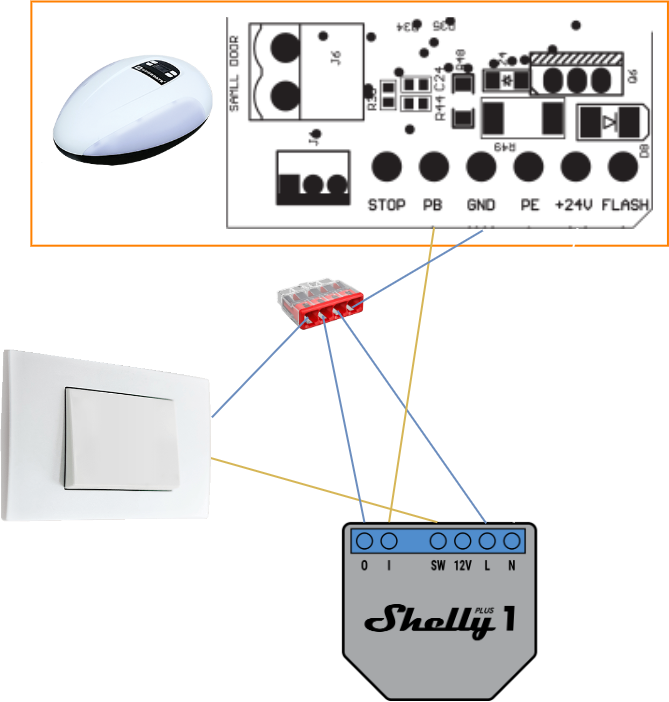
With this solution, it's possible to connect the Shelly to Home Assistant using the Shelly default integration, and also monitor the button usage in case we would like to do some automation using that information.
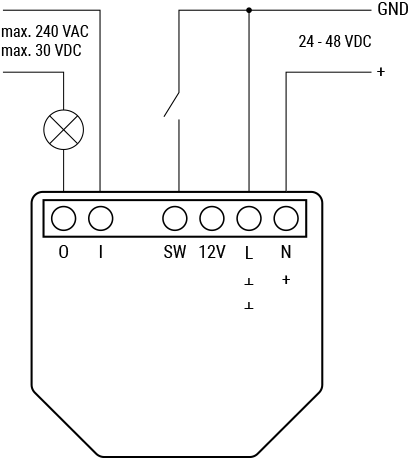
The Shelly Plus 1 can be powered with 12 VDC, 24-48 VDC or 110-240 VAC, since the roof motor already has a 24 VDC output we will use that to power the Shelly.
After everything is connected, it is time to setup the Shelly and the Home Assistant.
Shelly configuration
There are somethings that need to be done on the Shelly side:
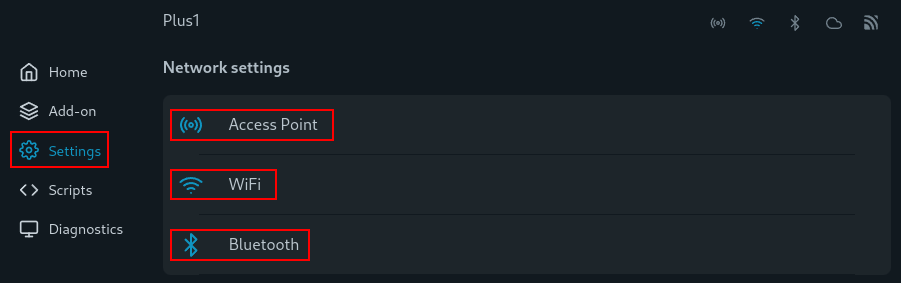
- Enable Wi-Fi
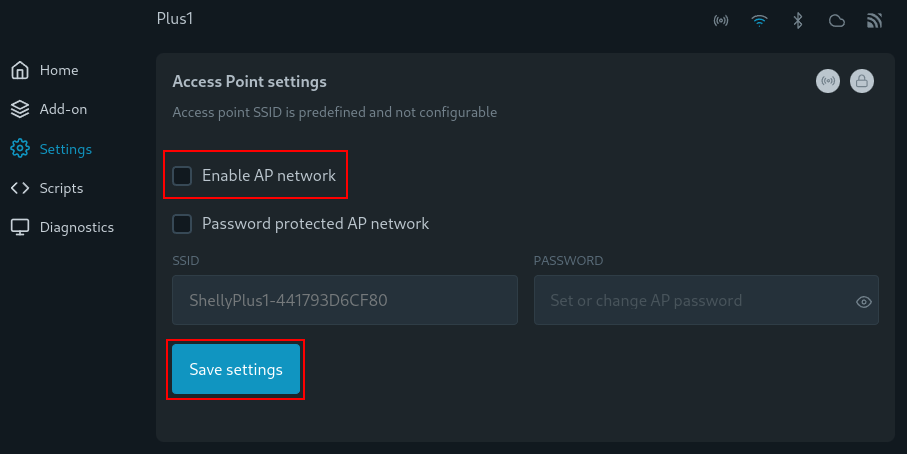
- Disable Access Point
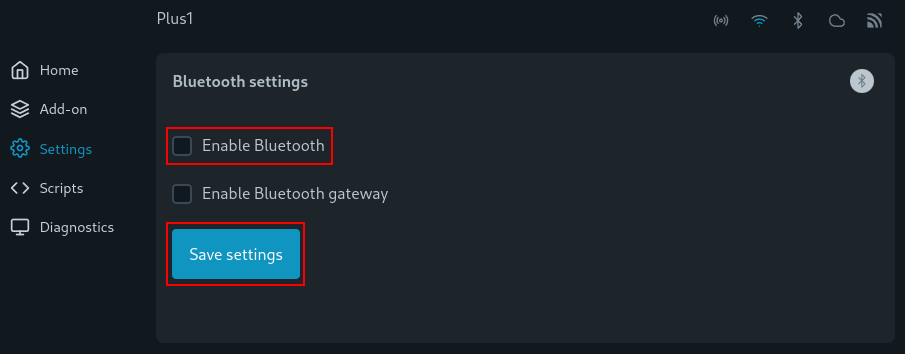
- Disable bluetooth (i'm not using it)
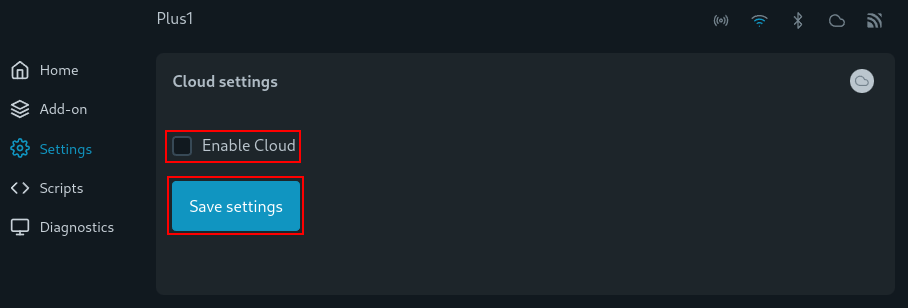
- Disable Cloud
- Set the Appliance Type
- Set the relay Timer
- Enable ECO Mode
After doing all the connections, you will see a new network that you can connect into, this is created by the Shelly Access Point. The SSID will be something like ShellyPlus1 - 84CCA87D7CDC, after connecting to that network, go into 192.168.33.1 (the default IP address inside the Access Point) and let's start the configuration.
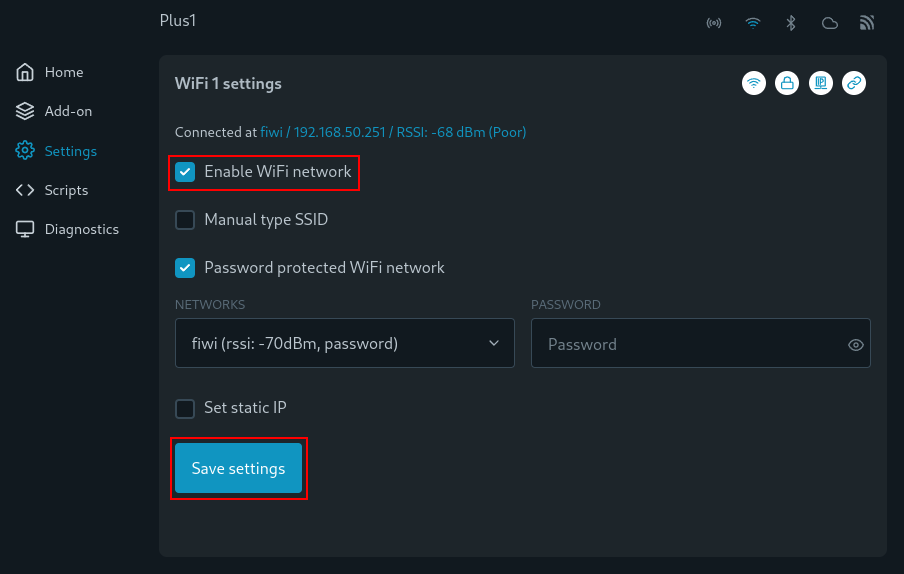
Starting with Wi-Fi, Access Point and Bluetooth, click on Settings on the right side and then go to Wi-Fi and add your settings, and click Save Settings in the end.
Do not forget to save the IP Address of the Shelly after setting the Wi-Fi, you will need it after disabling the Access Point.
After this we will disable both the Bluetooth and Access Point, for that go to settings again and select Bluetooth and Access Point to disable them.
After this, use the prevyously save IP address from the previous step to access the Shelly UI.
I also disable the Cloud service, since I use the Shelly through Home Assistant, I don't need this to be active.
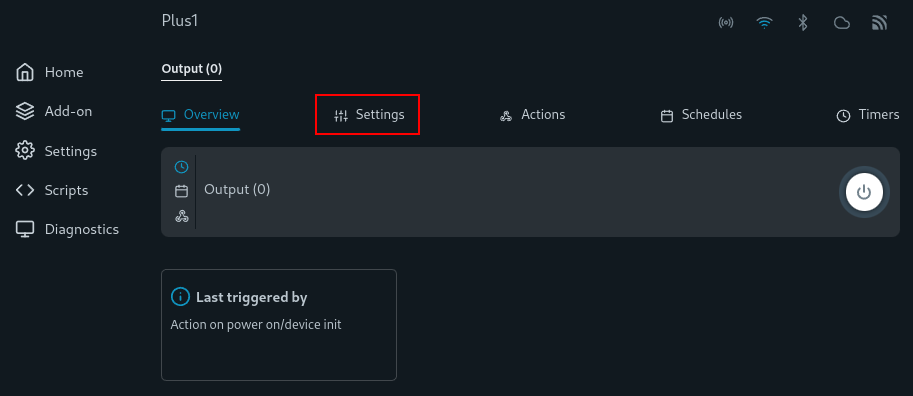
Now it's time to setup the "click" of the button, go into the Homepage and click on output.
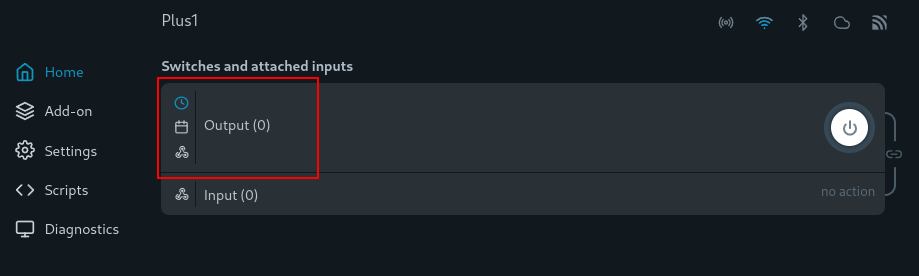
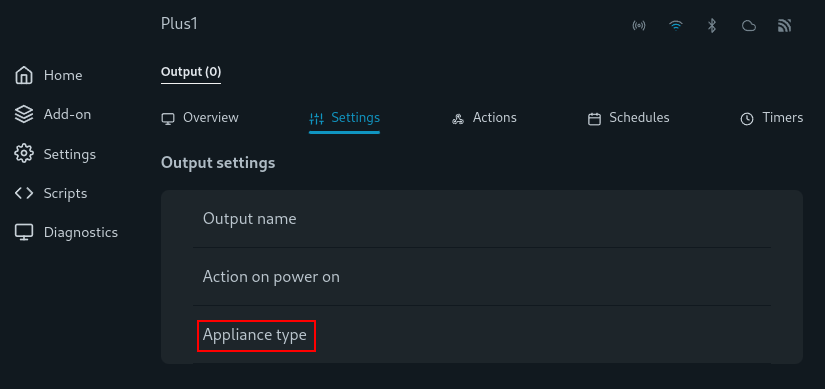
Now go to Settings.
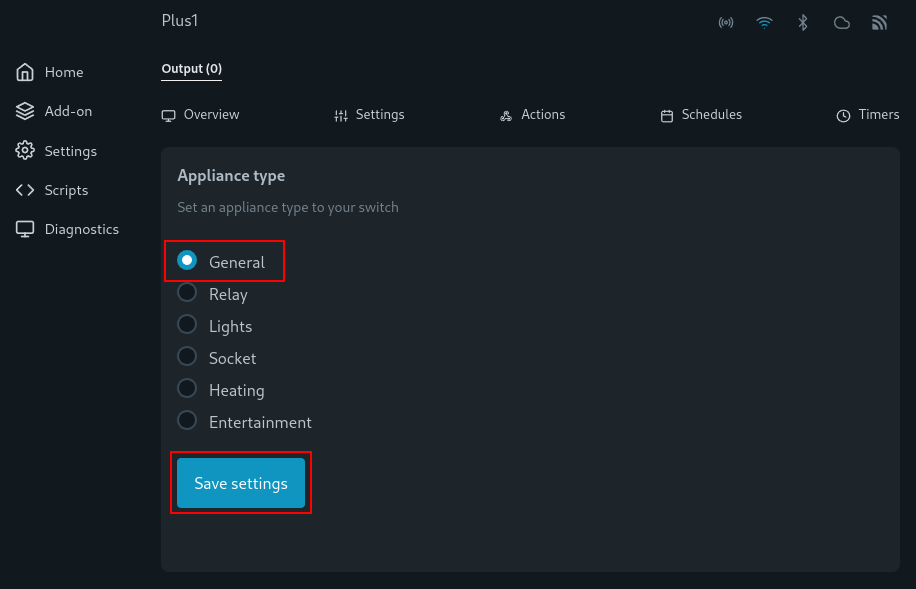
And on the Appliance type select General.
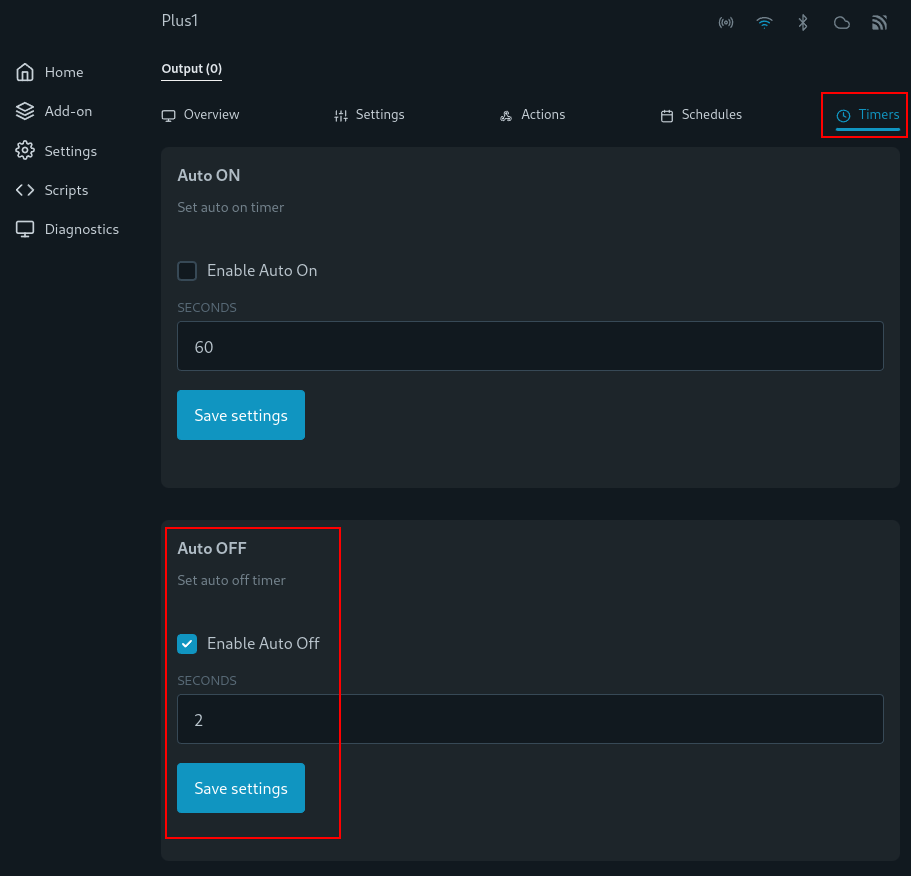
Right now, the relay works like an on and off switch, since we want to simulate a push of a button, we need to add a timer that will turn off the relay after it goes on.
For that, go into Timers and active the Auto OFF. I set it to 2 seconds, because it works for me and I haven't got any issues.
Now to finalize, we will enable Eco mode, because it's always good to save some money 😄.
Go back to settings, and click on Eco mode in the end.
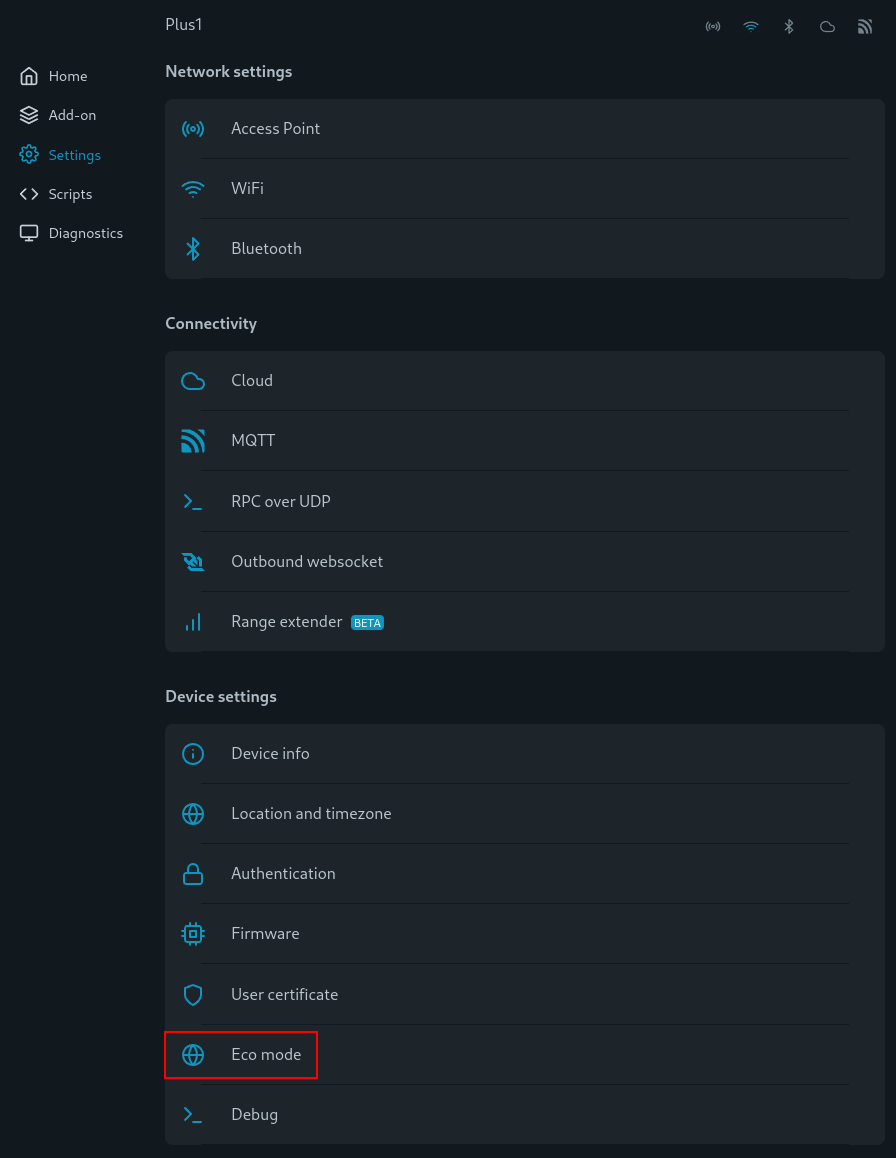
And enable it.

Home Assistant configuration
Go into Home Assistant and add the new device.
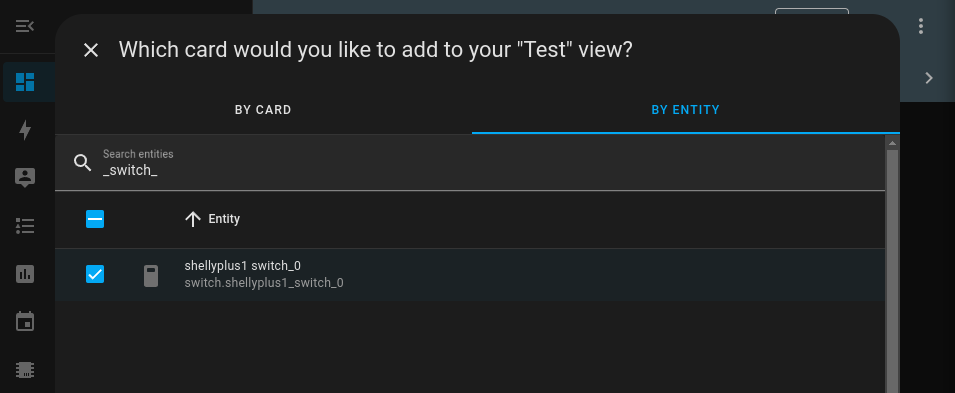
After that, go into your dashboard and create a new Card and look for the Shelly plus 1 switch.
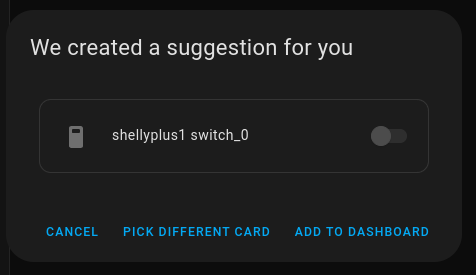

And that is it, you can click that switch and it will trigger the Shelly relay for the selected time on the Shelly configuration.
Conclusion
I understand that Doorgate is trying to sell their own products, but it would be also good to have the option and a better explanation from them on how to use the product with other services and products.