
Full thermal emitter automation with Home Assistant and Local Tuya

I have a bunch of thermal emitters at my house and I can't turn them all on at the same, not only because of the power bill but also because I don't have that much power available. So I had to think of a way to automate them to keep all rooms warm.
So I have more important rooms at home during the day and others at night. Mainly, during the day I want to focus on my living room and office, but for the night I want to focus on the bedrooms, for obvious reasons.
Also, all the automations and scripts can be found on my GitHub repo.
So what do I need to do?
- Basically, I need to turn the emitter on or off based on the room temperature
- I also need a way to understand how many emitters I should turn on
- I need to control if the maximum current is reached or else my power will go down
- There are emitters more important based on the time of the day
- Control everything from the dashboard
- And I want to be able to lock some emitters, meaning that they should always be on (baby room for example)
Solution
Room Temperature
The room temperature is easy to gather since the emitters already have that information.
Maximum Emitters
After some information gathering, and knowing that I have a maximum of 30A of current at my home, I found that I can have a maximum of 3 emitters on simultaneously, because of all the other electric stuff I have. So my maximum quantity of emitters should be 3.
Control the maximum current
To control the maximum current being reached, I used a Shelly EM to measure how much current I'm consuming at any moment, and then I created an automation that when the current is above 30 shuts down all the emitters. This way my power never goes down, and only the emitters are turned off.
Importance of heat emitters based on daytime
So I created two automations, one for the day (running between 8:29 and 19:00) and another for the night (running between 19:09 and 8:19). I am then triggering them every 10 minutes. Both automations are pretty similar, the only difference is the order in which they operate.
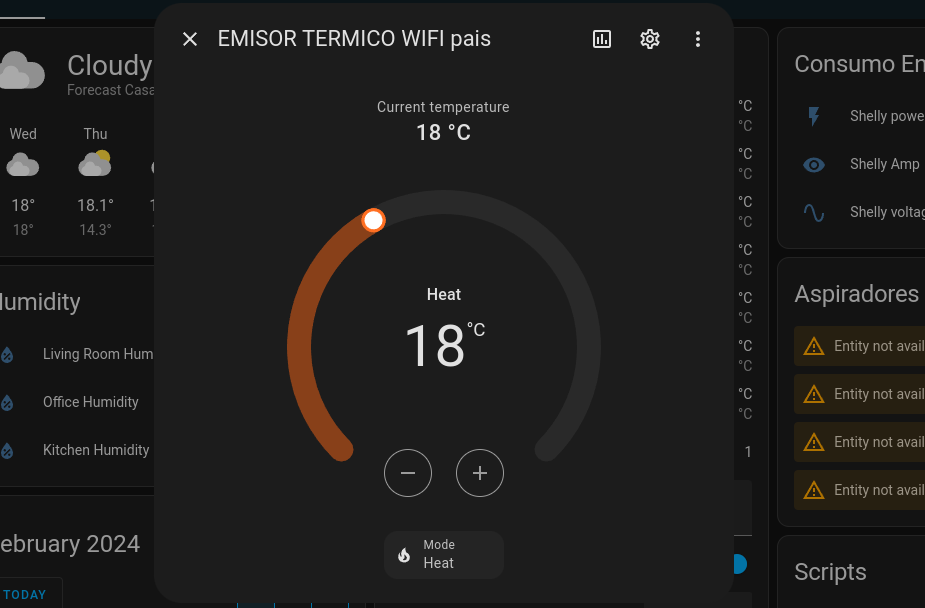
Dashboard control
With some Home Assistant helpers, I can define the minimum and maximum temperatures, also with LocalTuya and the thermostat cards I can control all the emitters in a single place.
Ability to lock some emitters
Using a Home Assistant boolean helper, I can use that value to check if the automation should use some emitters or not.
The setup
It's time to set up everything.
LocalTuya
I'll start with the LocalTuya. I'm not going through all the configurations since that can be found here, but I'm going to share the configuration I used for all of them.
I used the protocol version 3.3.
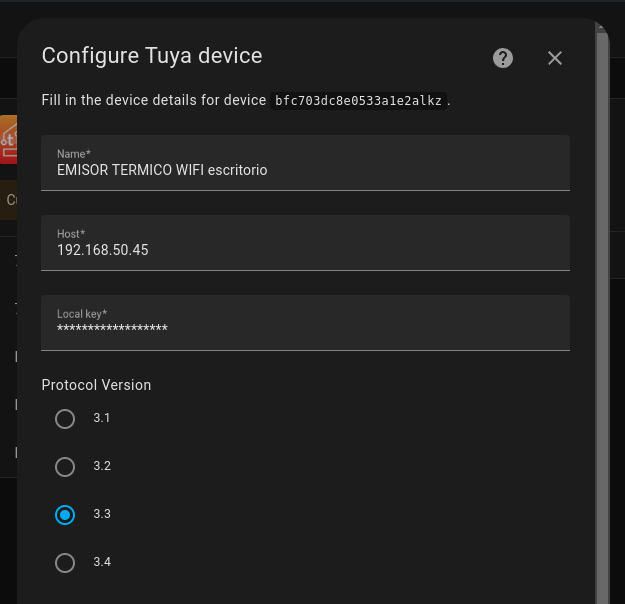
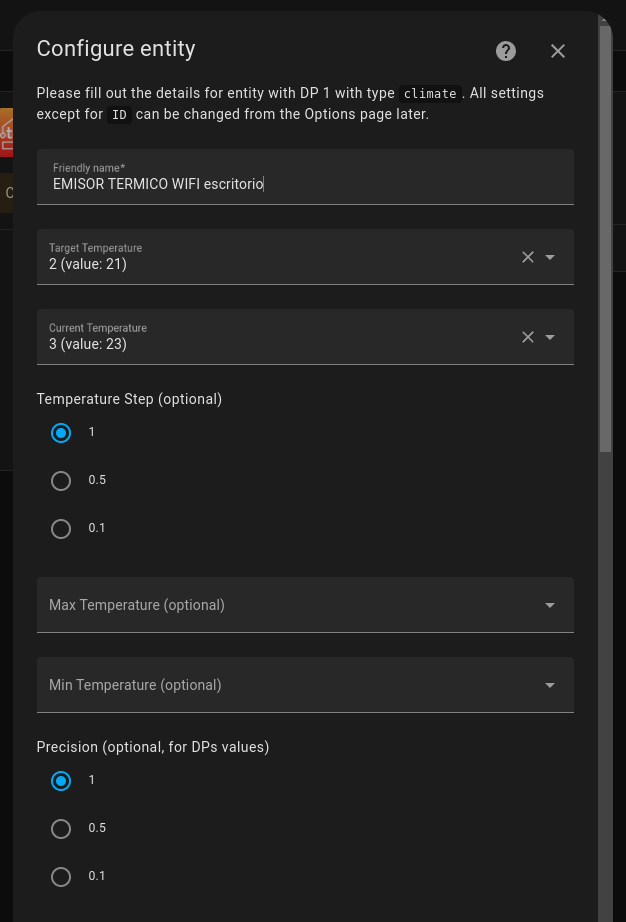
After this, it's only about the ids selected for each field.
The main ones were:
- Target temperature: 2
- Current temperature: 3
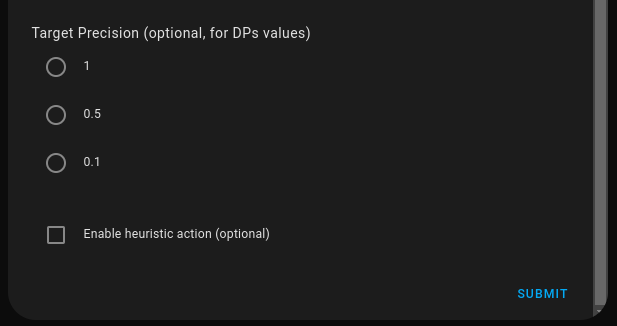
- Temperature step: 1
- Precision: 1
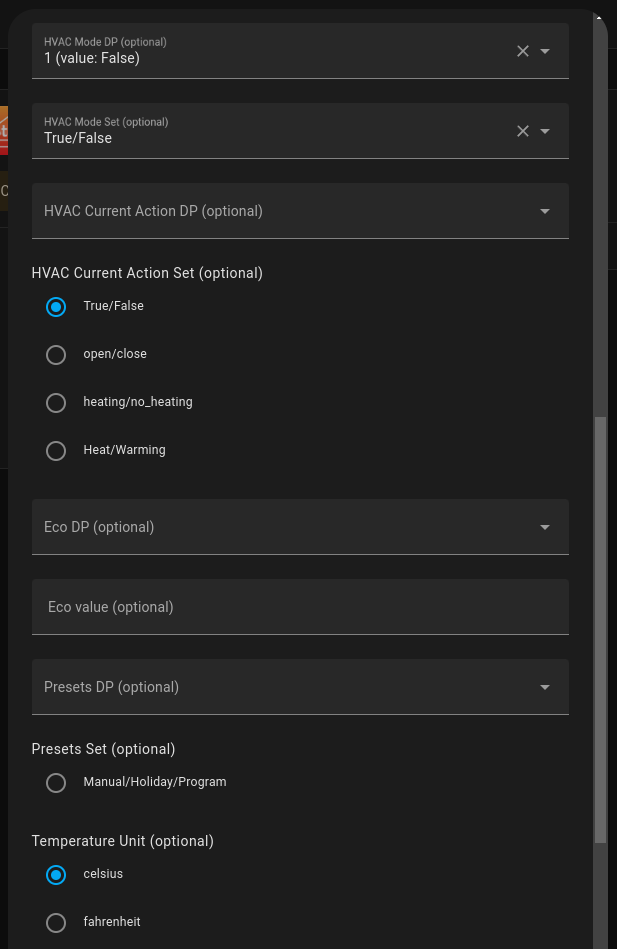
- HVAC mode dp: 1
- HVAC Mode set: True/False
- HVAC Current Action Set: True/False
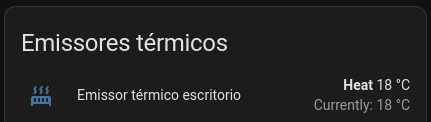
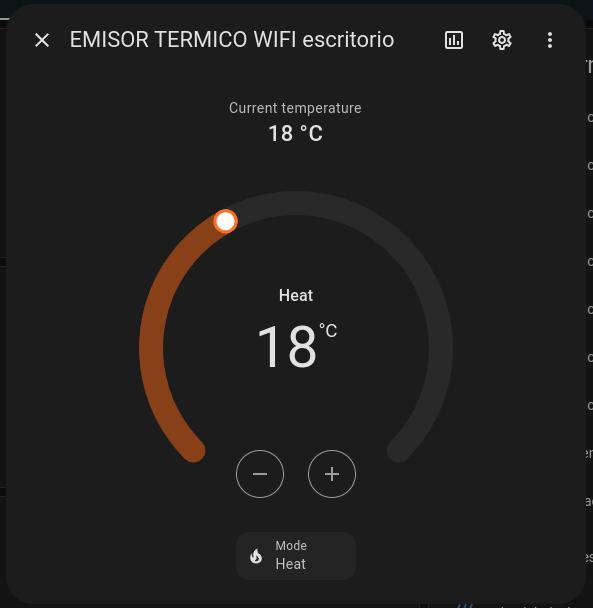
And after this, I was able to add the thermostat to the Home Assistant dashboard.
The needed Home Assistant helpers
Min/Max temperature
These will be used to define the minimum and maximum temperatures of an emitter. This means that, if an emitter is below the minimum it turns on, and if it's above the maximum it turns off. Very simple check that we can do later in the automation.
Configuration for both is an input type number:
- Name: Maximum temperature or Minimum temperature
- Icon: mdi:thermometer-high or mdi:thermometer-low
- Minimum value: 0
- Maximum value: 30
- Display mode: Input field
- Step size: 1
- Entity ID: input_number.temperatura_maximu/input_number.temperatura_minima (I'm Portuguese 😄)
Maximum heat emitters
This number will control the maximum heat emitters that the automation can turn on at a single time. Changing this number will automatically change the quantity of heat emitters allowed.
I used an input type number with:
- Name: Maximum emitters
- Minimum value: 0
- Maximum value: 5
- Display mode: Input field
- Step size: 1
- Entity ID: input_number.quantidade_maxima_emissores
Lock for specific emitters
I created a boolean for specific emitters, is the value is true, then the automation will not affect that emitter, making it impossible for the automation to turn on or off that emitter. This way I can keep the emitter in my baby's room always on when he is sleeping there.
Use a toggle helper for each lock:
- Name: Lock baby heat
- Icon: mdi:radiator
- Entity ID: input_boolean.lock_baby_heat
Quantity of turned-on emitters
The way I found to have this value was to create an automation that every time an emitter goes on or off it increases or decreases this number based on the new state. I then use this number to check if the maximum heat emitter value has been reached or not during the automation. (This was the solution I found to know how many emitters are on or off if you have another idea, please share it below 😄)
I used a counter helper:
- Name: Heat counter
- Minimum value: 0
- Initial value: 0
- Step size: 1
- Entity ID: counter.heat_counter
The scripts used by the multiple automations
You can find all these scripts on my GitHub account: here.
Stop heat - shuts down all the heaters but not the locked ones, GitHub link.
Stop heat if - shuts down all the heaters above the maximum temperature, GitHub link.
Turn on heat day - turn on the heaters below the minimum temperature until it reaches the maximum number of allowed emitters during the day, GitHub link.
Turn on heat night - turn on the heaters below the minimum temperature until they reach the maximum number of allowed emitters during the night, GitHub link.
The automations
You can find all these automations on my GitHub account: here.
Auto heat day
Occurs every 10 min between 8:29 and 19:00
Execution order
- Executes Stop Heat If
- Delay 1 sec
- Executes Turn on Heat Day
- Delay 1 sec
- Triggers Reset Heat counter
Auto heat night
Occurs every 20 min between 19:09 and 8:21
Execution order
- Executes Stop Heat If
- Delay 1 sec
- Executes Turn on Heat Night
- Delay 1 sec
- Triggers Reset Heat counter
Decrease heater counter when turned off
Every time an emitter is turned off it will reduce the emitter counter by 1.
Increase heater counter when turned on
Every time an emitter is turned on it will increase the emitter counter by 1.
Reset heat counter
There is an issue when making multiple calls to a counter service because it will sometimes skip some of the calls.
To fix this issue, I created this automation that basically resets the counter every 2 minutes.
Stop energy consumption
This automation will turn off all the heat emitters at the same time once the energy consumption reaches 30Amp (this is the limit on my side).
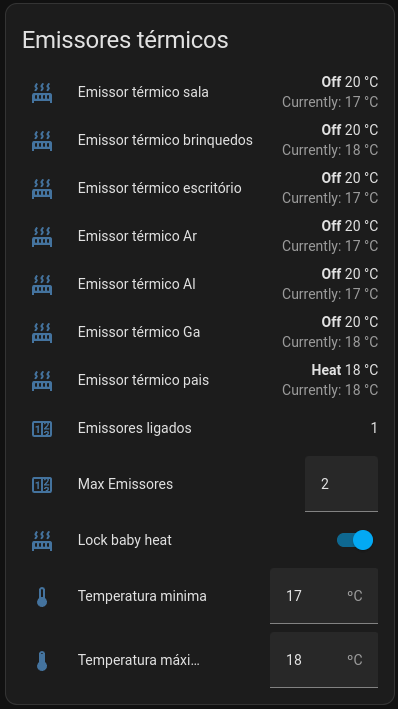
The dashboard
I've created a section on my dashboard where I can manage all the emitters and also the automation at the same time. You can also find the YAML config on the GitHub repo.
I hope this can be helpful to someone, I know that the IDs and serial numbers, etc will differ in everyone's integration, but if this serves as a guideline for someone, I will already be happy 😄